10.6. Using dot9 Stompboxes
10.6.1. dot9 Edit Menu
The Edit Menu is used for managing your Presets and adjusting the settings of your dot9 stompbox.

Fig. 10.18 The edit page displays the TriceraChorus dot9 parameters.
Click the burger icon for the following options:
Backup Device
Restore Device
Factory Reset
Zoom In ctrl/⌘ + =
Zoom Out ctrl/⌘ + -
Reset Zoom ctrl/⌘ + 0
Click any Preset to load a Preset from the list. You can also navigate the list using the up and down arrow keys, and press Enter to select a Preset.
Unsaved Changes
If your current preset has unsaved changes, you will be prompted to save it before the new preset is loaded.
Click “Yes” to load the new preset after saving the changes.
Click “No” to load the new preset without saving the changes.
Click “Cancel” to stay on the current preset.
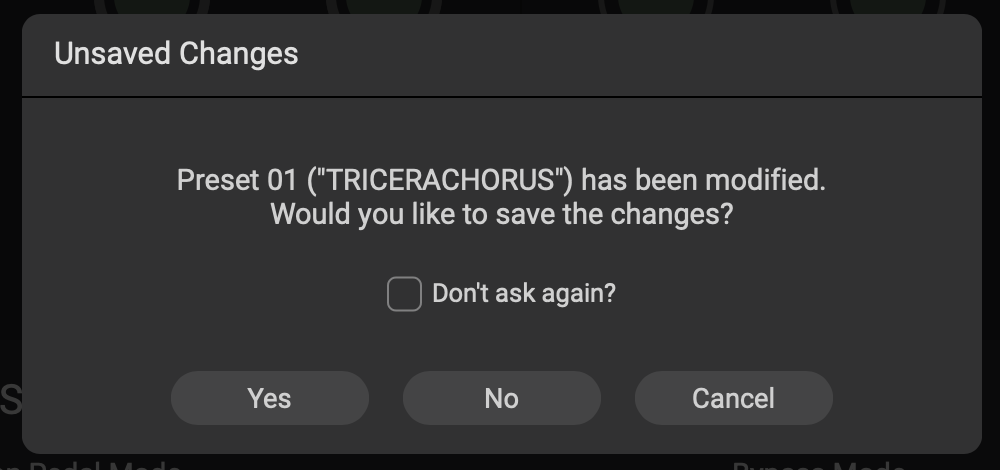
Fig. 10.19 The “TriceraChorus” Preset changes have not yet been saved.
Click the preset name to change it.
Tap or type in the tempo for the stompbox to follow. This will be disabled if MIDI Clock is on, and it will not be available if the stompbox you are using is not tempo based.
Save the current preset settings.
Save the current preset to another list location.
Adjust the footswitch and LED button parameters.
Adjust the main effect parameters. Primary parameters are displayed on the left, Secondary parameters are displayed on the right.
Import the selected preset.
Export to the selected preset.
Delete the selected preset.
Expression Mapping
Select a parameter and click the drop-down arrow to map it to the expression pedal:
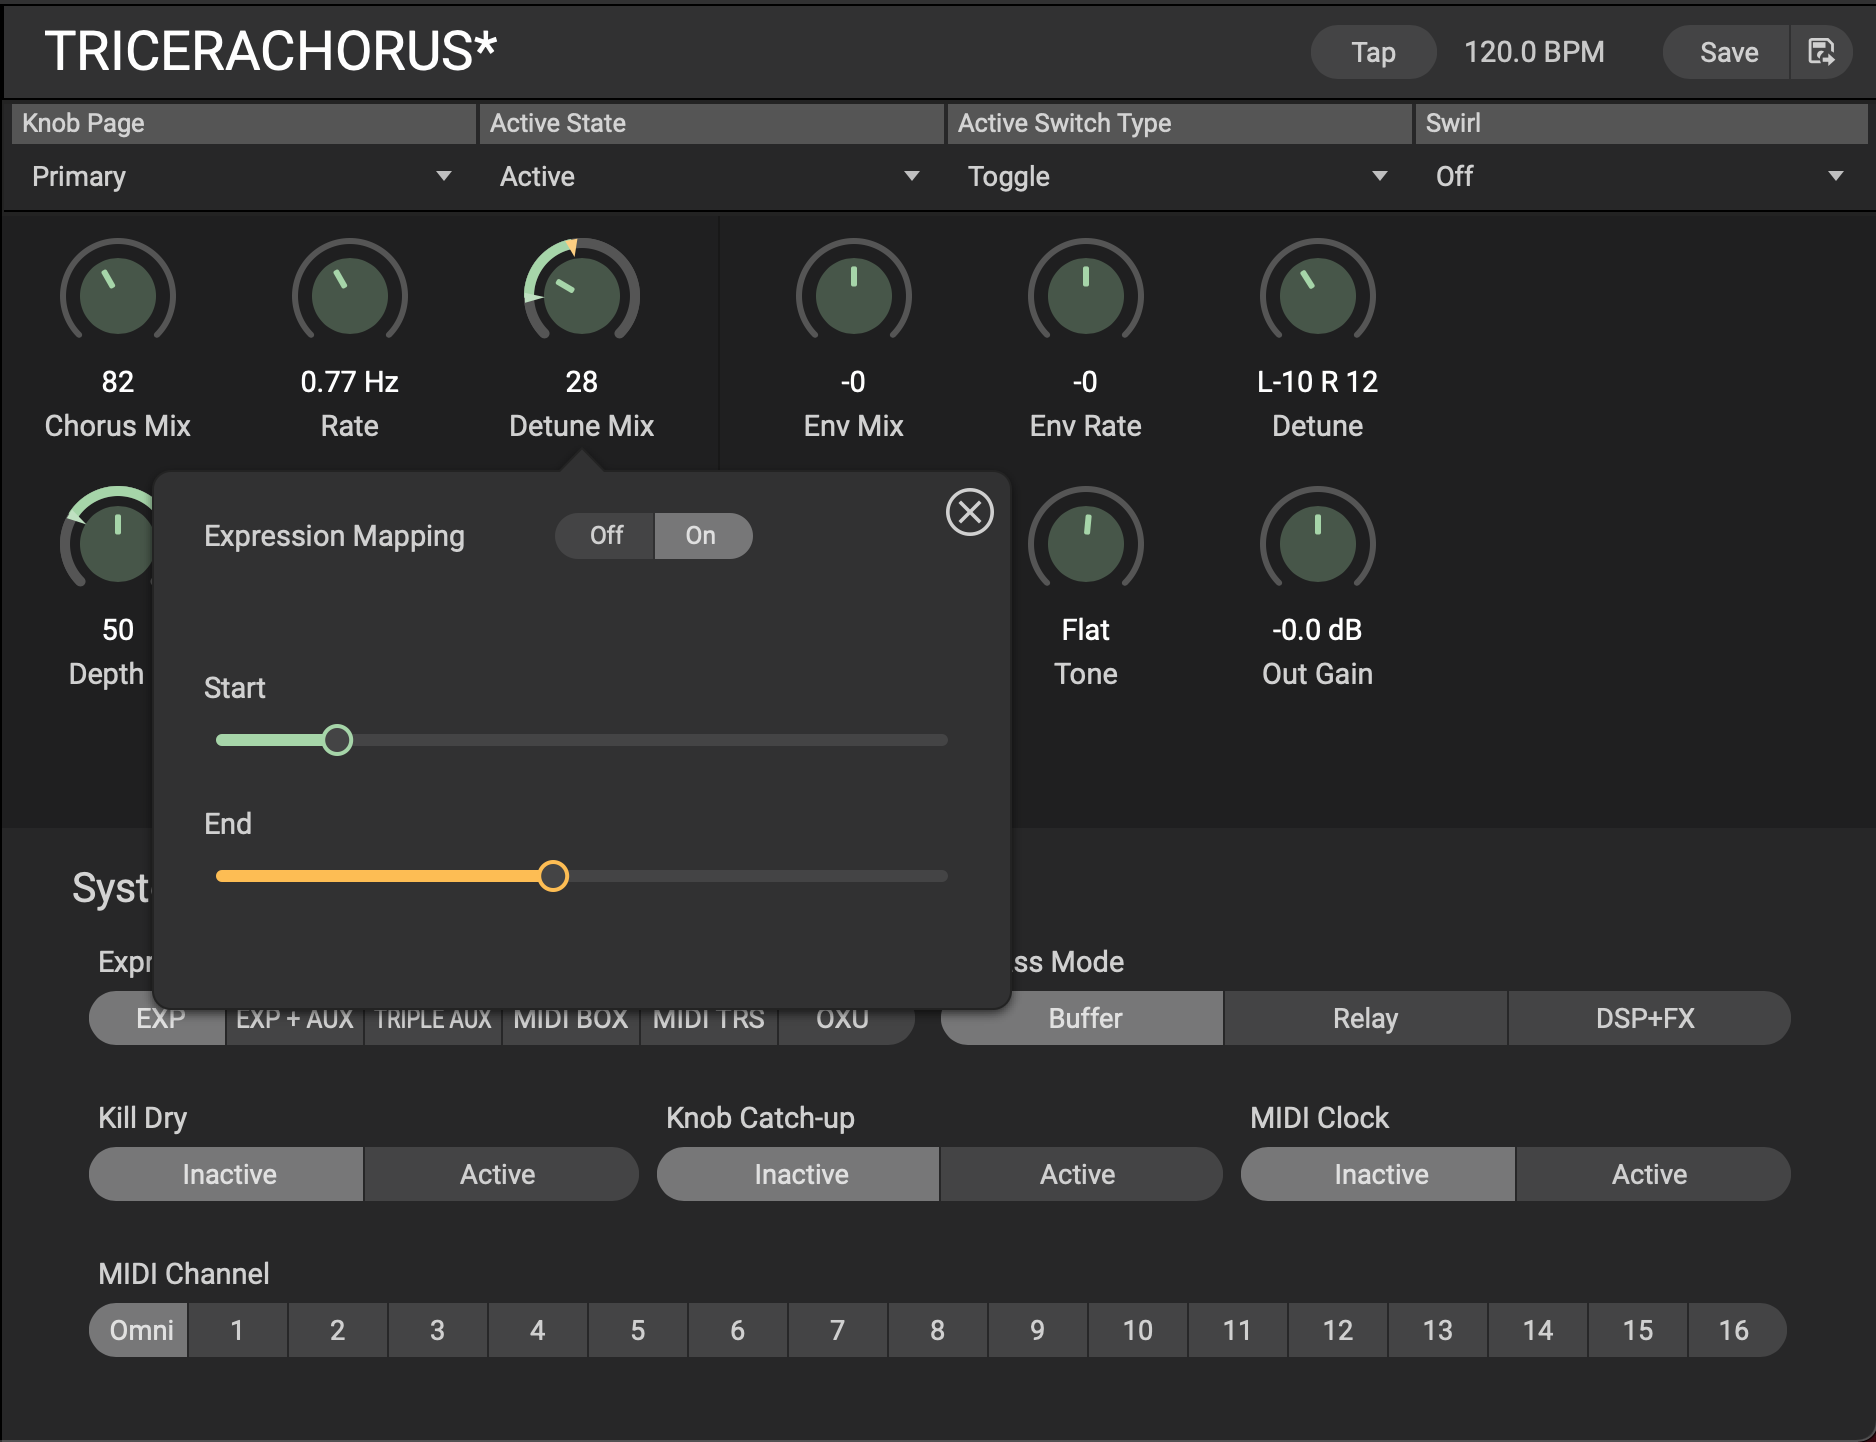
Fig. 10.20 The Detune parameter is mapped to the expression pedal.
10.6.2. dot9 System Settings
- Expression Pedal Mode
Exp: Expression Pedal
Exp + Aux:
Tip = Expression Pedal
Aux = Tap Tempo
Triple Aux:
Tip = Increment Preset
Ring = Decrement Preset
Tip+Ring = Load Preset
MIDI Box: Receive MIDI via a MIDI convertor box
MIDI TRS: Receive MIDI directly with a DIN or TRS to TRS cable
OXU:
Tip = Decrement Preset
Ring = Increment Preset
Tip+Ring = Load Preset
- Bypass mode
Buffer: Keeps signal running through the DSP when bypassed.
Relay: Directly connects inputs to outputs with physical relay switches.
DSP+FX: Keeps signal running through the DSP when bypassed and allows delay/reverb bypass tails.
- Kill Dry
Removes the dry signal from the output. Useful for wet/dry, effects sends, and aux/bus configurations.
- Knob Catch Up
With Catch Up ON, the sound does not change until the Knob is moved to the position corresponding to the current value. The LED Ladder indicates whether the knob must be turned CCW (top LED blinks) or CW (bottom LED blinks). The LED flashes more rapidly as the knob approaches the value set by the Preset. All five LEDs blink once when the knob matches the stored Parameter value.
- MIDI Clock
Allows your dot9 to receive MIDI clock via the USB or expression pedal input.
- MIDI Channel
Set which channel your dot9 receives MIDI messages on. 0-16 or Omni.