6.4. Parameters
Parameters Edit Mode allows you to adjust and map the Program-level and Preset parameters.
Press the Parameters Button to enter Parameters Edit Mode. Press again to cycle through P/A/B parameter groups. Turn the Select Knob to scroll through the pages of parameters in the current group. Adjust the parameters by turning the Quick Knobs.
Press the P LED Button to view the Program’s general parameters. Press it again to bypass/activate the Program.
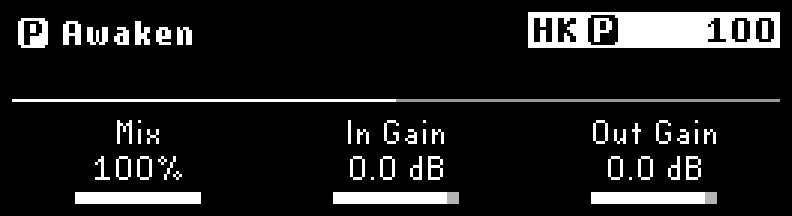
Fig. 6.25 Parameter Edit Mode displaying the parameters of the Program
Press the A LED Button to view the parameters for Preset A. Press it again to bypass/activate Preset A.

Fig. 6.26 Parameter Edit Mode displaying the parameters for Preset A
Press the B LED Button to view the parameters for Preset B. Press it again to bypass/activate Preset B.
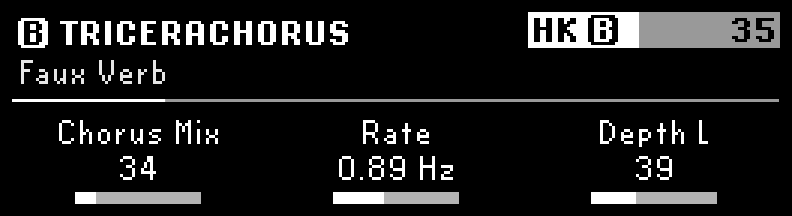
Fig. 6.27 Parameter Edit Mode displaying the parameters for Preset B
6.4.1. Mapping
The H90 offers a wide variety of parameter mapping for internal and external controllers. All of your custom parameter mapping will be configured in Parameters Edit Mode.
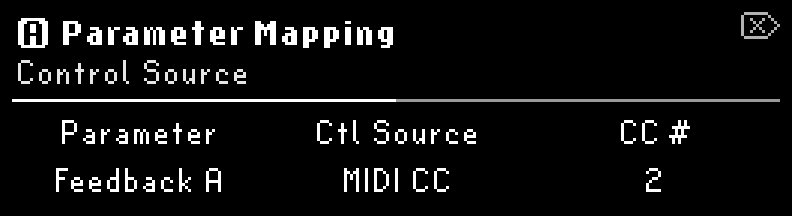
Fig. 6.28 External Mapping menu
To map a parameter:
Press and hold the Quick Knob that controls the parameter you wish to map.
Turn Quick Knob 2 to select a control source.
Turn the Select Knob to view the Control Range menu. Turn Quick Knobs 1 and 2 to set the Start/End or Minimum/Maximum values of the controller.
You can reverse the direction of your external controller by adjusting the End point to be before the Start point. For example, setting the End point to zero and Start point to 100 will result in the Heel of your expression pedal being 100 and Toe of your expression pedal being 0.
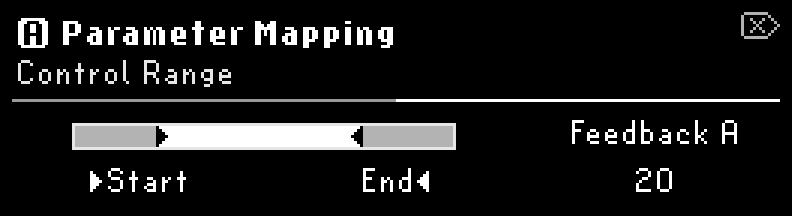
Fig. 6.29 Control Range menu
Remember!
Begin at the beginning and go on till you come to the end: then stop.
Turn Quick Knob 1 to choose another parameter to map.
To un-map a parameter, set the Control Source to “Off”.
Press the Perform Knob to exit the mapping menu.
Tip
If you’d like to map many Program-level or Preset parameters at once, press the P/A/B LED to quickly jump to other Preset or Program mapping options without ever leaving the mapping menu.
6.4.2. HotKnob
The HotKnob can be used to map multiple parameters to a single controller, much like the ribbon controller from the H9. The H90 expands upon this control by giving you three HotKnobs; P, A, and B.
Press the Parameters Button to cycle through the different parameter view pages, and this will determine which HotKnob is being used. Note that in Perform Mode, HotKnob P will always be used.
To map a parameter to a HotKnob:
Follow the above instructions to map a parameter and select a HotKnob as the control source.
If you selected HotKnob P, press the P LED to view the Program parameters page, and turn the Perform Knob to control HotKnob P.
If you selected HotKnob A or B, press the A or B LED to view that Preset’s parameters page, and turn the Perform Knob to control HotKnob A or B.
Tip
A HotKnob can also be mapped to internal or external controllers. This can be useful for mapping both HotKnobs A and B to HotKnob P and control both HotKnobs simultaneously, or mapping a HotKnob to an expression pedal for easy control. You can also map a HotKnob to a Quick Knob using the Quick Knob Assignments menu.
6.4.3. HotSwitch
A HotSwitch can be thought of as a snapshot of a group of parameters. If the chorus of your song needs higher gain and more delay, map those parameters to a HotSwitch and engage it for the chorus. Then, disengage to go back to the previous parameters, or activate another HotSwitch with different parameters for the second verse.
There are three HotSwitches, one for each P, A, and B Footswitch. Mapping parameter values to a HotSwitch allows you to use a Footswitch in Perform Mode to toggle those mapped values. Note that only one HotSwitch can be active at a time.
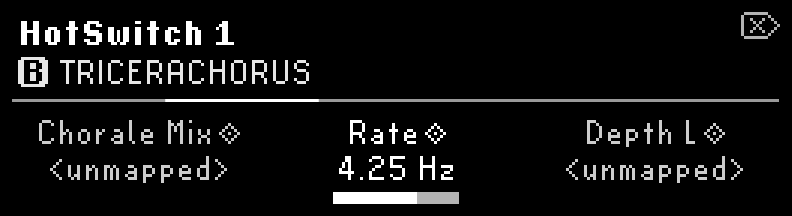
Fig. 6.30 HotSwitch mapping menu displaying the parameters for HotSwitch 1
To map a HotSwitch:
Press the Parameters Button to enter Parameters Edit Mode.
Press and hold the P, A, or B LED Button to map its respective HotSwitch.
Press a Quick Knob to assign the parameter to the HotSwitch. Turn the Quick Knob to change the value of that parameter.
Turn the Select Knob to view other Preset or Program-level parameters to be mapped.
Press the P/A/B LED Button to jump to other groups of Preset or Progam-level parameters to be mapped.
Press the Quick Knob of a mapped parameter to un-map it.
Press and hold another LED Button to map a different HotSwitch without exiting the mapping menu.
Press the Perform Knob to exit the HotSwitch mapping menu.
6.4.4. Tempo Sync
Press the Presets and Parameters Buttons together to toggle Tempo Sync on/off.
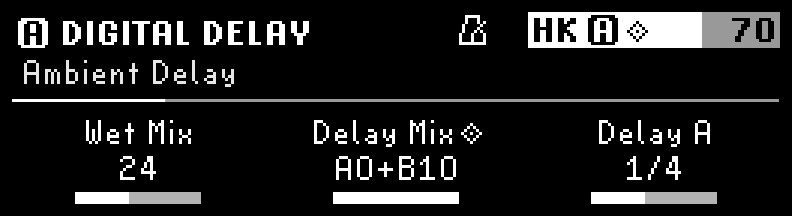
Fig. 6.31 A metronome icon will indicate that Tempo Sync has been enabled.
Tempo Sync determines whether certain parameters will display tempo-synced subdivisions, or a continuous range of rates. For example, UltraTap’s Length parameter can display milliseconds or subdivisions, while UltraTap’s Speed parameter can display Hertz (cycles per second) or subdivisions.
Tempo Sync can be applied to the entire Program, or to individual Presets within a Program.
Toggling Tempo Sync while a Preset’s parameter group is selected will enable/disable Tempo Sync for that individual Preset.
Toggling Tempo Sync while the Program’s parameter group is selected will enable/disable Tempo Sync for both Presets.