4.3.6. Scenes View
Scenes View allows you to create and edit Scene Maps and their contained lists of scenes. Scenes View has four sections:
The left side of the screen displays a list of Scene Maps.
The middle portion of the screen displays trigger sources and scenes contained in the currently active Scene Map.
The right side of the screen displays options for the currently highlighted scene or trigger source.
The bottom portion of the screen displays the FX chains in the currently loaded scene.
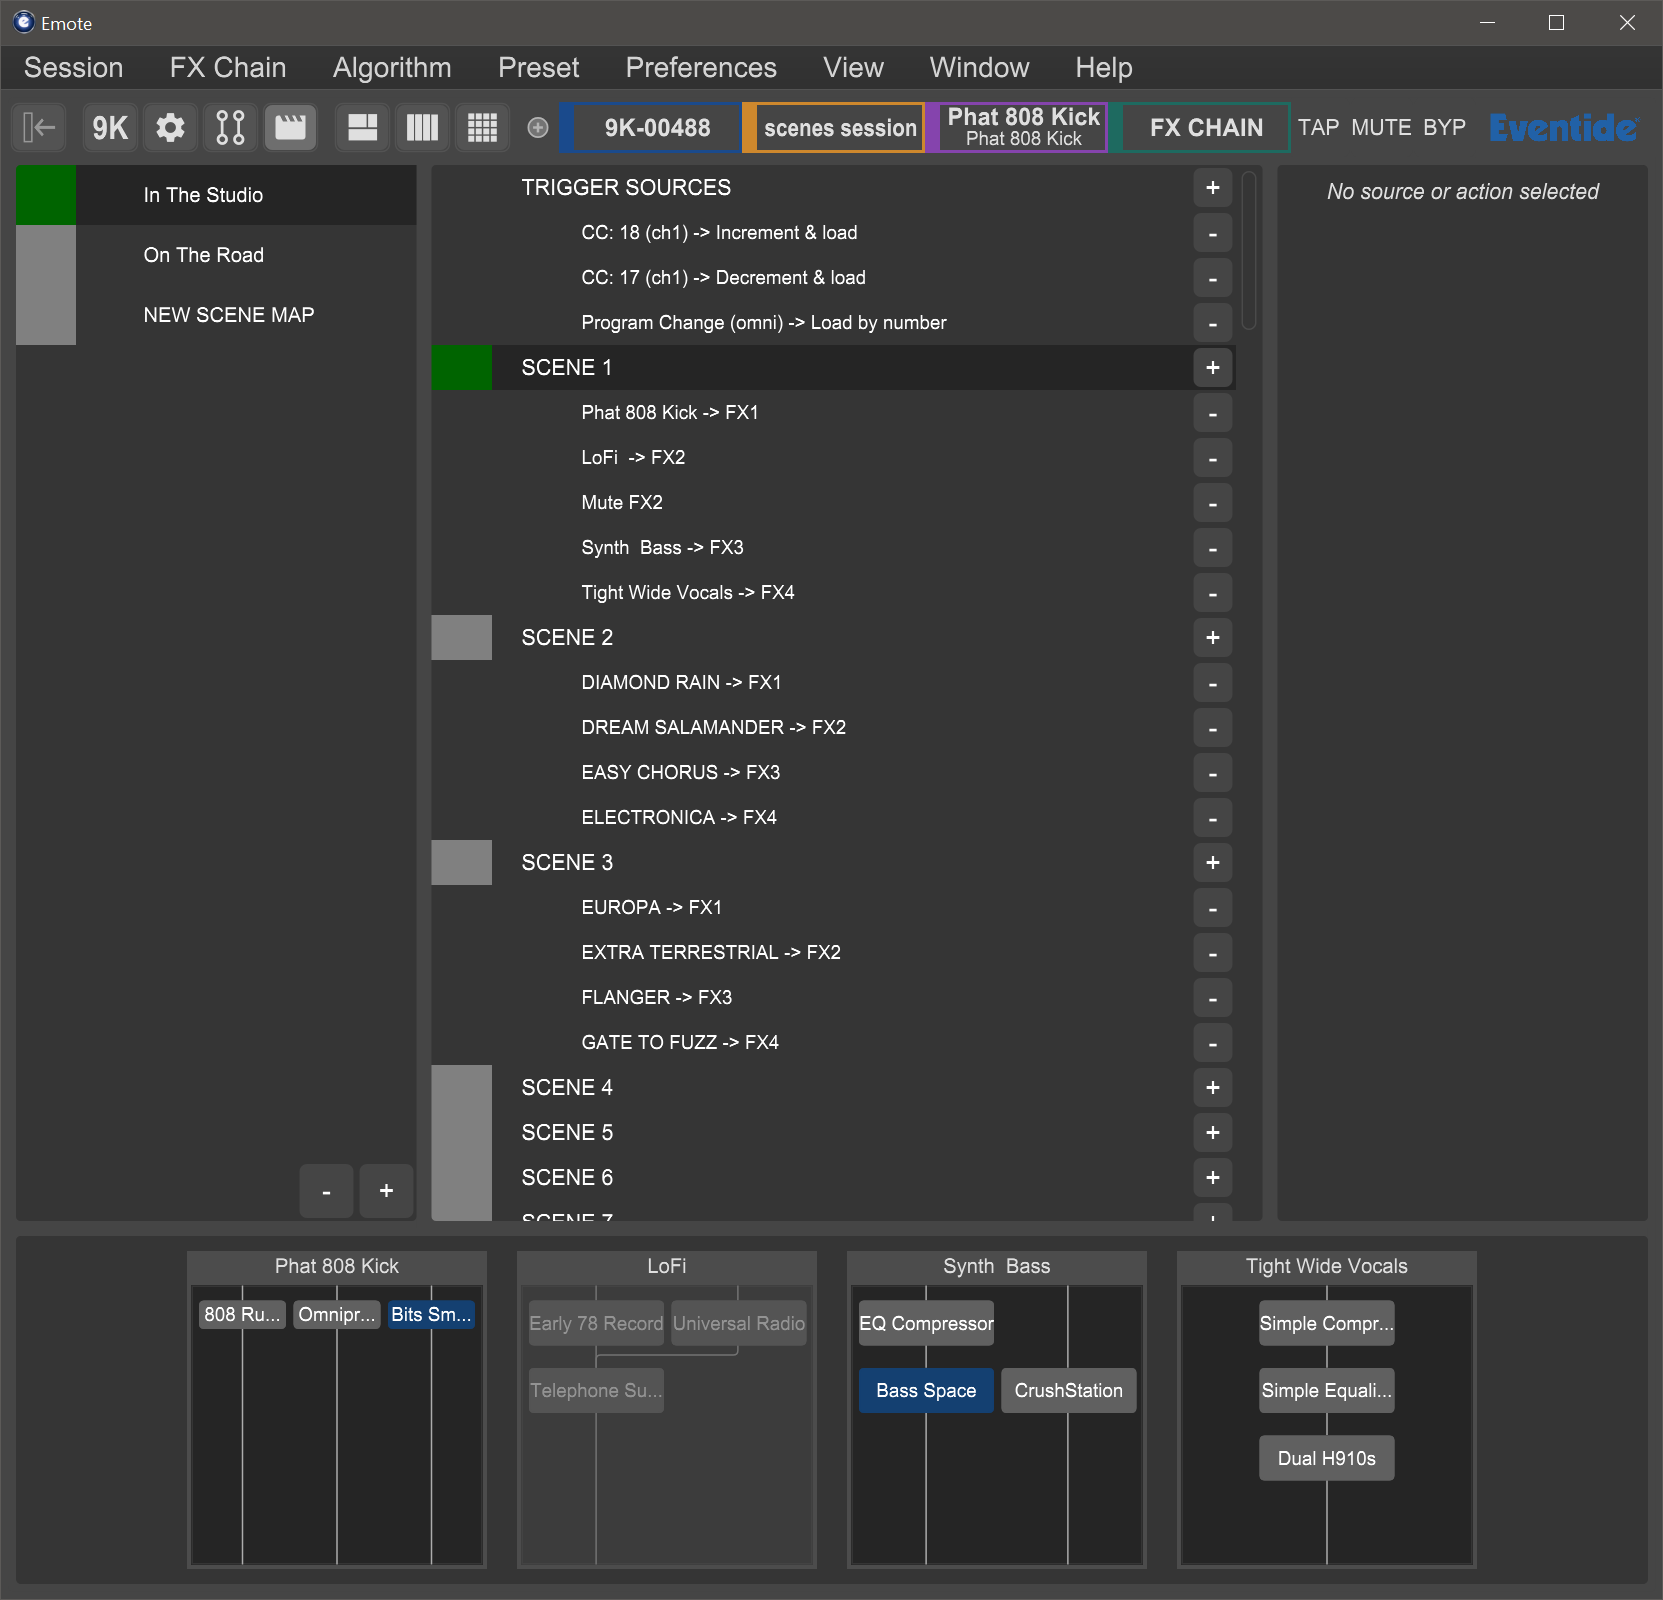
Fig. 4.8 Scenes View
- Scene Maps
The Scene Maps portion of the left side of the screen will be your starting point for creating and using scenes. Each Scene Map can have a total of 128 scenes and only one Scene Map can be active at any given time.
To create a Scene Map, press the “+” icon at the bottom of the Scene Map portion of the screen and a new map will be added to the list. To rename a Scene Map, right-click its text and a prompt to rename it will appear.
To delete a Scene Map, highlight the map that you’d like to delete and press the “-” icon. A prompt will ask you to confirm that you’d like to delete this map.
Double click a Scene Map or press RETURN to activate it. The square to the left of its text will change from grey to red, indicating that it is now active. Double-click it or press RETURN again to deactivate it.
- Scenes and Trigger Sources
The middle and right portions of the screen work in tandem to provide all the information needed for creating and customizing your scenes.
The middle portion of the screen offers control of two key areas:
The list of trigger sources contained within the currently active Scene Map.
The list of scenes contained within the currently active Scene Map.
- Creating and Editing Trigger Sources
To add a new trigger source, click the “+” icon to the right of the “TRIGGER SOURCES” text.
Highlight a trigger source, and a list of options will show up on the right side of the screen.
You will now have the ability to customize your source mode, message type, and MIDI channel (refer to Section 5.8.3.1: Trigger Source Options for more information about specific trigger sources).
Alternatively, click “Learn” and move your desired external control source to automatically map it as the trigger source.
To delete a trigger source, click the “-” icon to the right of the trigger source that you’d like to delete.
To delete all trigger sources, right-click the “TRIGGER SOURCES” text and a prompt will appear to delete all sources.
- Creating and Editing Scenes
Scenes can be edited manually or by using the Scene Capture mode.
To manually add a new action, press the “+” icon to the right of the scene that you’d like the action to be added to. A new action will appear below that scene.
Highlight the newly added action and a list of options will appear on the right side of the screen.
You will now have the ability to Load, Enable, Mute, or Bypass an FX chain or algorithm for any of the four FX chains.
To capture a scene, right-click the scene and select the Capture Scene prompt.
This will take a “Snapshot” of all FX chain settings and parameters in the current session.
To delete all actions, right-click the scene and select the “Remove All Actions” prompt.
- FX Chain Display
The bottom portion of the Scenes page in Emote will display the currently loaded FX chains and algorithms. This is useful for monitoring what changes are being made as you load scenes.
4.3.6.1. Working with Scenes in Emote
Scenes can be selected and activated by clicking on them in the Emote GUI or by sending the appropriate MIDI message as configured above.
Double-click a Scene Map or press RETURN to activate it. You will now be able to select and activate any of its contained scenes.
Double-click a scene or press RETURN to activate it. The square on the left side of its text will be turned yellow as it is pending, and then green once it has loaded.
When sending “Increment Up/Down” MIDI messages, the square to the left of the scene’s text will become yellow to indicate it is pending. When a “Load Current” message is sent the square will become green, indicating that it has been loaded.
If the square to the left of a scene’s text is red, then the Scene Map in which it is contained is not active and therefore will not accept MIDI messages.
Note
Scenes cannot be triggered by automating the Emote plugin parameters in a DAW. To trigger scenes from your DAW, send the appropriate MIDI messages via USB-B or a MIDI interface.