10.3. Edit Menu
Edit Menuは、プリセットの編集と保存に使用します。
10.3.1. The Playlist
Playlistは、すべてのEdit Menuタブの画面左側に表示されます。
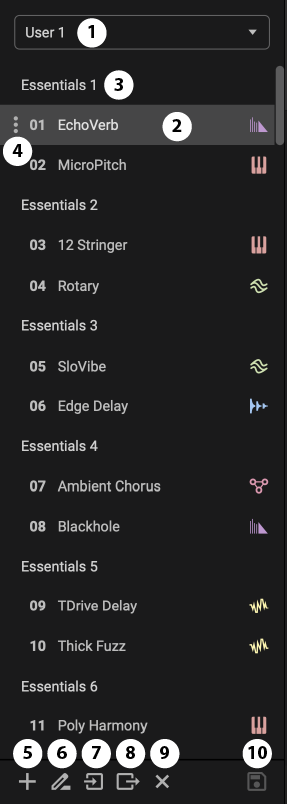
図 10.5 Playlist。
ドロップダウン・メニューからリストを選択してください。
Playlistからプリセットをクリックして読み込みます。上下の矢印キーでPlaylist内を移動することもできます。
Unsaved Changes
現在のプリセットに未保存の変更がある場合、新しいプリセットがロードされる前に、保存するかどうかの確認が表示されます。
変更を保存してから新しいプリセットをロードするには「Yes」をクリックしてください。
変更を保存せずに新しいプリセットをロードするには「No」をクリックしてください。
現在のプリセットにとどまるには「Cancel」をクリックしてください。
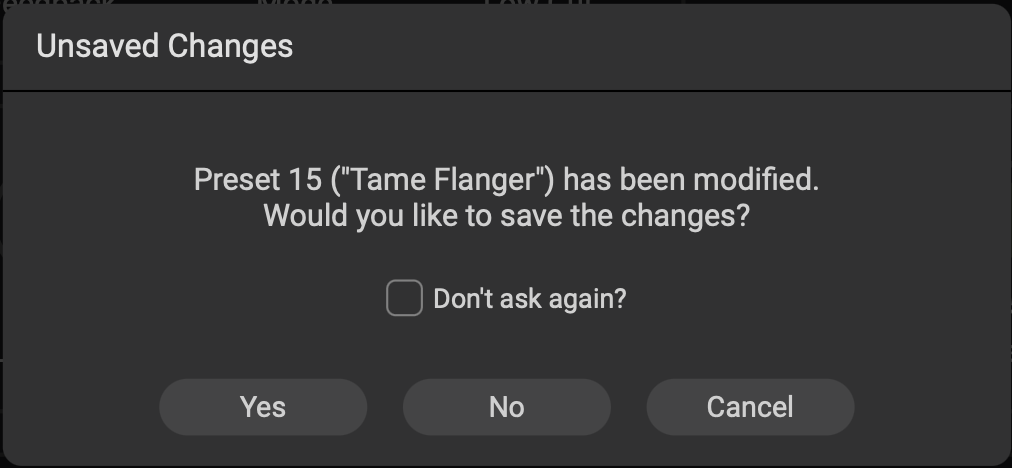
図 10.6 「Tame Flanger」プリセットの変更はまだ保存されていません。
Bankをクリックすると名前を変更でき、EnterまたはReturnキーを押すと新しいBank名が保存されます。
3つの点のアイコンをクリックすると、以下のオプションが表示されます:
プリセットをコピーします。その後、Playlist内の別のスロットに貼り付けることができます。
Delete/Initialize。プリセットのすべての設定を消去し、まっさらな状態に戻します。
プリセットをインポートします。コンピューター上の場所から新しいプリセットをロードします。
プリセットをエクスポートします。プリセットをコンピューター上の場所に保存します。
新しいリストを作成します。これは自動的にPlaylistになります。
現在のリストの名前を変更します。
Listをインポートします。Eventide Controlで作成したプリセットリスト、またはH9 Controlで作成したH9リストをインポートできます。
Listをエクスポートします。Playlistをコンピューター上の場所に保存します。
リストを削除します。この操作を実行してよいか確認が表示されます。
現在のプリセットを保存します。
10.3.2. Parameters Edit Menu
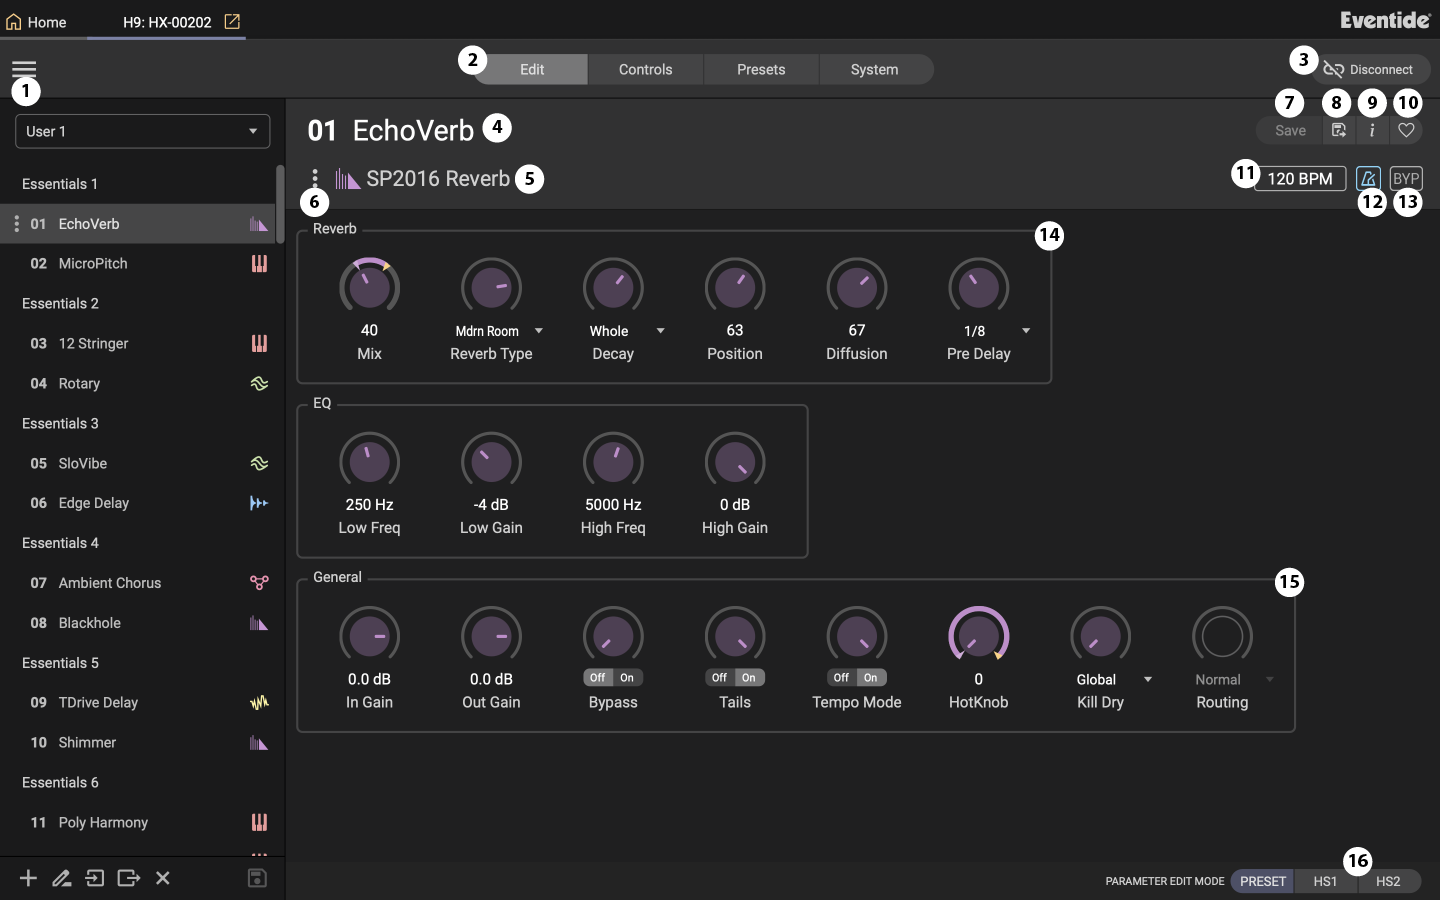
図 10.7 Parameters Edit Menu。
ハンバーガーアイコンをクリックすると、以下のオプションが表示されます:
このユーザーガイドを表示します。
サポート用にEventide Controlのログファイルを開きます。
Backup Device。これにより、H9のすべての設定の完全なバックアップを、コンピューター上のファイルとして保存できます。
以下の設定は保存されません:
現在のプリセット。
現在のPlaylistの選択状態、およびPlaylist内で現在選択されているプリセットのインデックス。
現在どのSelect/Performモードにいるか、Bank/List Selectモード、プリセット絞り込みフィルター、Bluetooth設定といった、その他の状態。
Restore Device。以前のバックアップからコンピューター上のファイルを選択し、その状態を復元します。この操作により、ペダルの現在の状態とすべての設定が、復元するバックアップの状態によって上書きされることにご注意ください。
サポート用にペダルのログを保存します。
タブをクリックして、Edit Menu、External Controls、Preset Library、System Settingsのいずれかを表示するよう選択してください。
H9を切断します。ホームページから再度H9を接続し直す必要があります。
プリセット名をクリックすると、ドロップダウン・メニューから新しいプリセットを選択するか、プリセット名を変更できます。
アルゴリズムタイトルをクリックすると、ドロップダウン・メニューから新しいアルゴリズムを選択できます。
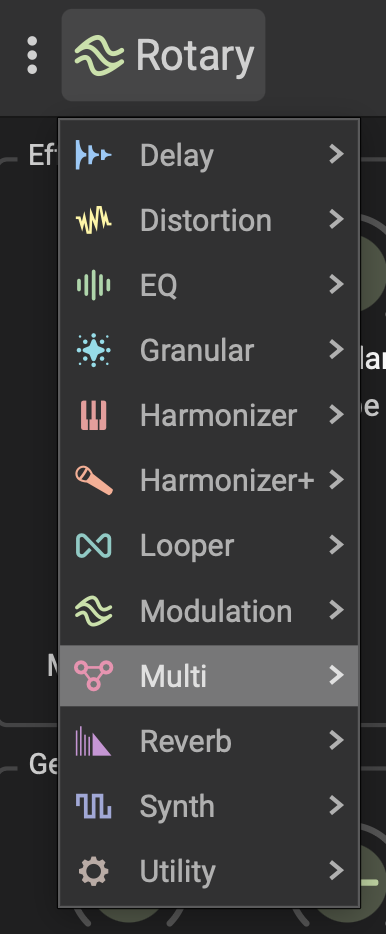
図 10.8 ドロップダウン・メニューからアルゴリズムを選択してください。
3つの点のアイコンをクリックすると、以下のオプションが表示されます:
アルゴリズムのドキュメントを表示。
プリセットをコンピューター上の場所にエクスポートします。
コンピューター上の場所からプリセットをインポートします。
プリセットを保存します。
変更を保存!
ペダル本体と同様に、パラメーターが変更されるたびに、プリセット名の横にアスタリスクが表示され、未保存の変更があることを示します。
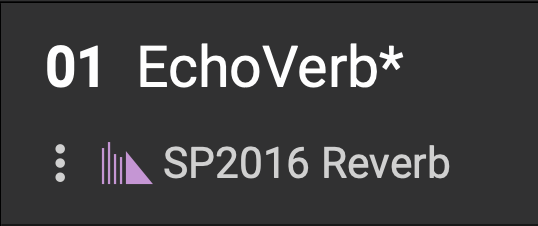
図 10.9 アスタリスクは未保存の変更を示します。画面右上または左下にある保存ボタンをクリックすると、変更が保存されます。
プリセットを新しいリストの位置に保存します。
プリセットのメモを表示・編集します。
プリセットをお気に入りに追加します。
BPMの設定を調整します。
テンポ同期をオン/オフに切り替えます。
プリセットをバイパスします。
Mix、ディレイタイムなど、アルゴリズム固有のパラメーターを編集します。
HotKnob、Input/Outputゲイン、ルーティング、テール、Kill Dry設定など、一般的なパラメーターを編集します。
HotSwitch 1~2を選択し、選択したHotSwitchのパラメーターを編集します。
10.3.3. コントロールアサイン
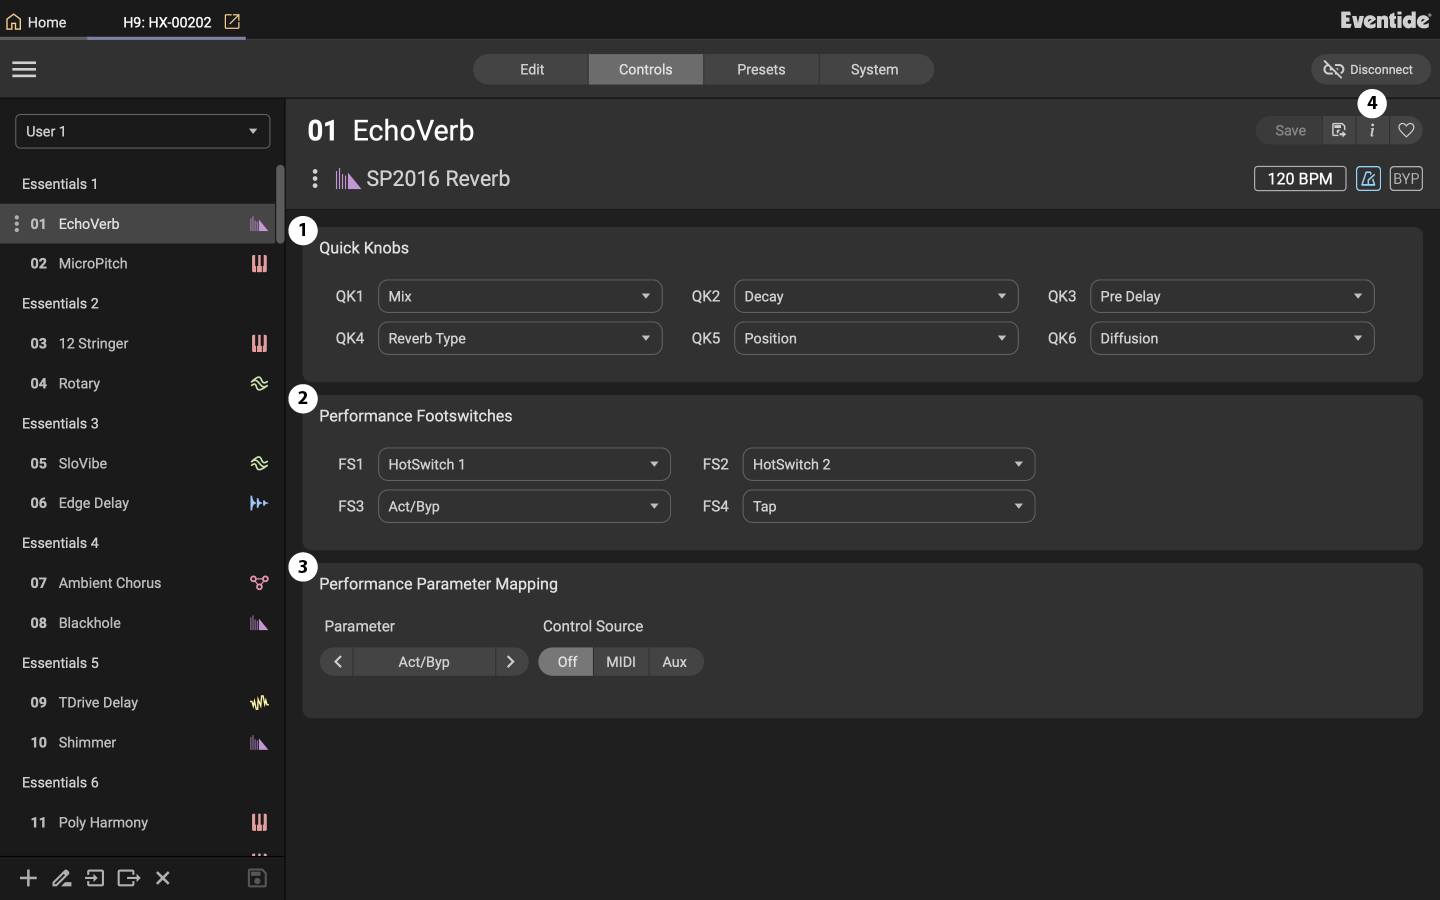
図 10.10 Control Assignments編集メニュー。
6つの使用可能なQuick Knobにパラメーターを割り当てます。
4つの本体搭載フットスイッチに、Performance ParameterとHotSwitchを割り当てます。
使用可能なPerformance Parameterに外部コントローラーを割り当てます。
パラメーターのドロップダウン・メニューをクリックして、パラメーターを選択してください。
コントロール・ソースとしてMIDI CCまたはAux Switchを選択してください。
詳細については、ユーザーマニュアルの Performance Parameters セクションをご参照ください。
10.3.4. プリセットライブラリ
プリセットライブラリは、H9に保存されているすべてのプリセットを管理する場所です。また、プリセットをリストに整理するためにも使用します。
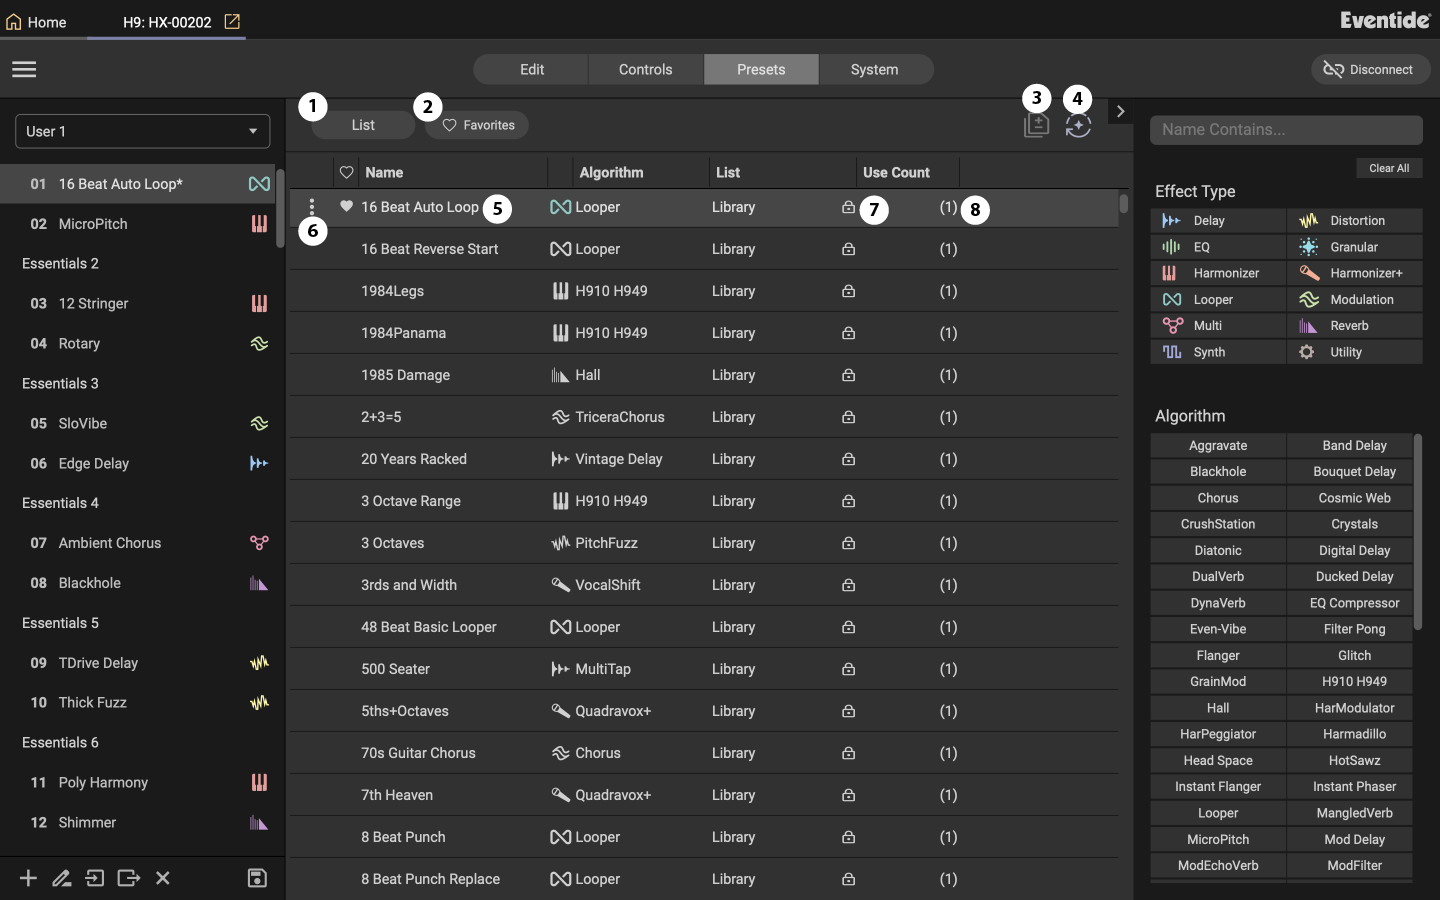
図 10.11 Preset Library。
「Algorithm」 フィルターを使用すると、特定のAlgorithmのすべてのプリセットを検索できます。
お気に入りに登録されたプリセットのみを表示します。
複数のリストに存在する重複プリセットを非表示にします。
プリセット自動読み込み:
有効にすると、プリセットは選択時に即座に読み込まれます。
無効の場合、ダブルクリックまたはEnterキーを押してプリセットを読み込みます。
自動読み込みの設定に応じて、プリセットのテキスト上の任意の場所をクリックして読み込みます。プリセットをクリックしてプレイリストのリスト位置にドラッグすると、その位置のプリセットを上書きできます。
3点アイコンをクリックしてプリセットをコピーします。現在のプレイリストにある99個のプリセットのいずれかの3点アイコンをクリックすることで、別のリスト位置に貼り付けることができます。
鍵のアイコンはFactory Presetであることを示しています。これは上書きできません。
使用数はそのプリセットが含まれているリストの数を表示します。
10.3.4.1. プリセットブラウザー
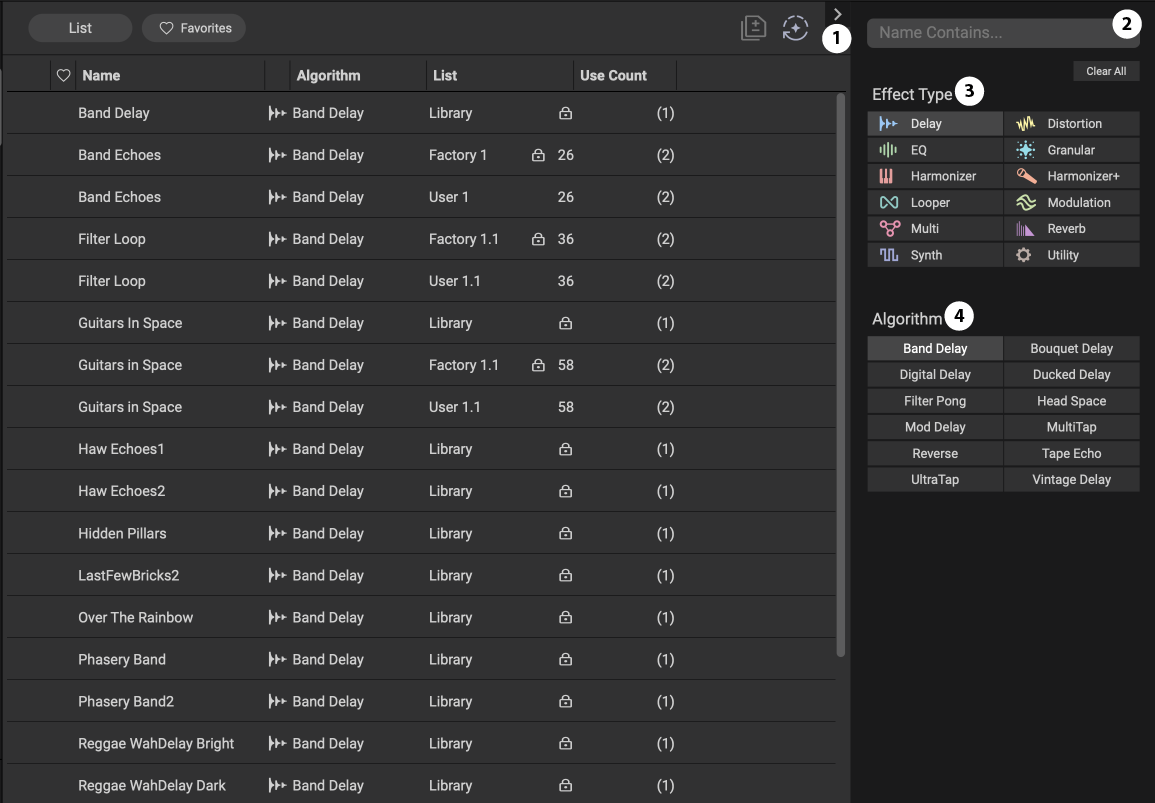
図 10.12 「Delay*」と 「Band Delay」 フィルターを適用したプリセットブラウザー。
矢印をクリックすると、検索バーの表示/非表示が切り替わります。
検索バーを使って、プリセットを名前で検索してください。
Effect Type フィルターを使用すると、特定のエフェクトタイプのすべてのプリセットを検索できます。
Algorithm フィルターを使用すると、特定のアルゴリズムのすべてのプリセットを検索できます。