10.2. Home Screen
Eventideアカウントにログインしてデバイスを登録すると、最初にホーム画面が表示されます。
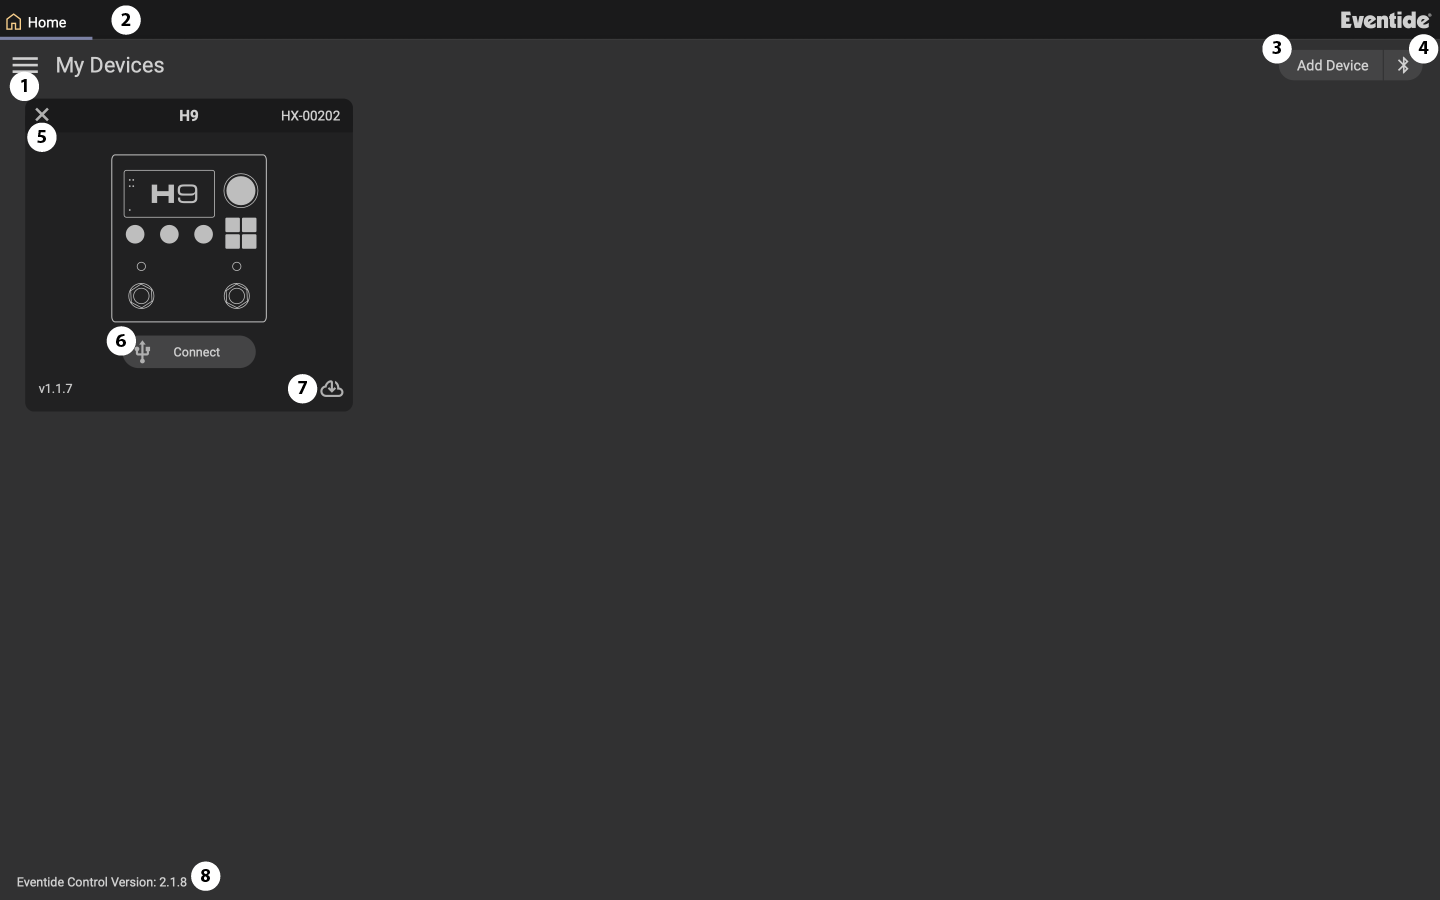
図 10.3 Eventide Controlのホーム画面。
ハンバーガーアイコンをクリックすると、以下のオプションが表示されます:
Eventide Controlの設定
Eventideアカウントからログアウト
このユーザーガイドを表示
サポート用にEventide Controlのログファイルを開く
Recovery Modeのアップデートにアクセス
Update Modeでdot9をアップデート
Eventide Controlに関するAbout情報を表示
Zoom In
Windows: control + =
Mac: command + =
Zoom Out
Windows: control + -
Mac: command + -
Reset Zoom
Windows: control + 0
Mac: command + 0
デバイスに接続すると、上部のバーに表示されます。複数のデバイスに同時に接続し、それぞれをこの方法で選択できます。矢印アイコンをクリックすると、デバイスのタブを切り離して別ウィンドウで表示できます。
Add Deviceボタンをクリックすると、H9を追加し、接続できるようになります。
BluetoothアイコンをクリックするとH9のBluetoothペアリング処理が開始されます。
Xアイコンをクリックすると、デバイスが削除されます。
ここでデバイス情報を確認できます。「Connect」をクリックすると、パラメーターの編集を開始できます。デバイスのシリアルナンバー、ソフトウェアのバージョン、USB接続かBluetooth接続かについても確認できます。
デバイスにアップデートが利用可能な場合は、クラウドのアイコンをクリックしてください。
ここで、使用中のEventide Controlのバージョンを確認できます。
Eventide Control接続のヒント:
H9は、接続方法(USBまたはBluetooth)に応じて、Eventide Control上に2つのデバイスとして表示されます。これは、デバイスの画像の下にある接続アイコンで示されます。
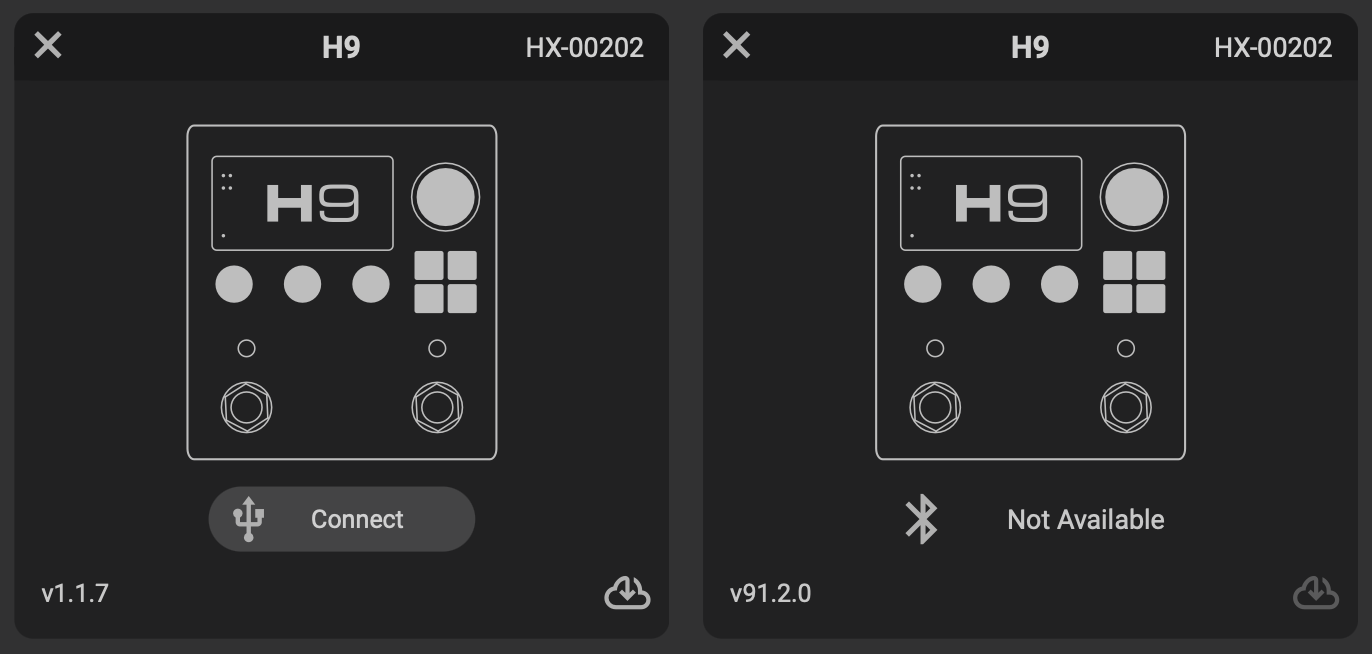
図 10.4 USBデバイスは左側に、Bluetoothデバイスは右側に表示されます。
H9はBluetooth経由ではアップデートできません。アップデートするにはUSB接続を使用する必要があります。アップデートするには、USBデバイスの右下にあるクラウドのアイコンをクリックしてください。
BluetoothとUSBの両方で、H9 Controlを実行している複数のデバイスにH9を同時に接続しないでください。