6.2. Parameters
Press the Parameters Button to enter Parameters Edit Mode.
Parameters Edit Mode allows you to adjust and map a Preset’s parameters.
Each Preset contains [A] Algorithm parameters, and [G] General parameters:
[A] Algorithm level parameters will change depending on what Algorithm is loaded. For example, SP2016 Reverb will include Algorithm level parameters like Decay and Reverb Type.

Fig. 6.5 The Algorithm-specific parameters for SP2016 Reverb.
[G] General parameters will always offer the same options, regardless of what Algorithm is loaded. General parameters include:
Input Gain
Output Gain
Bypass Tails
Kill Dry
HotKnob
Routing
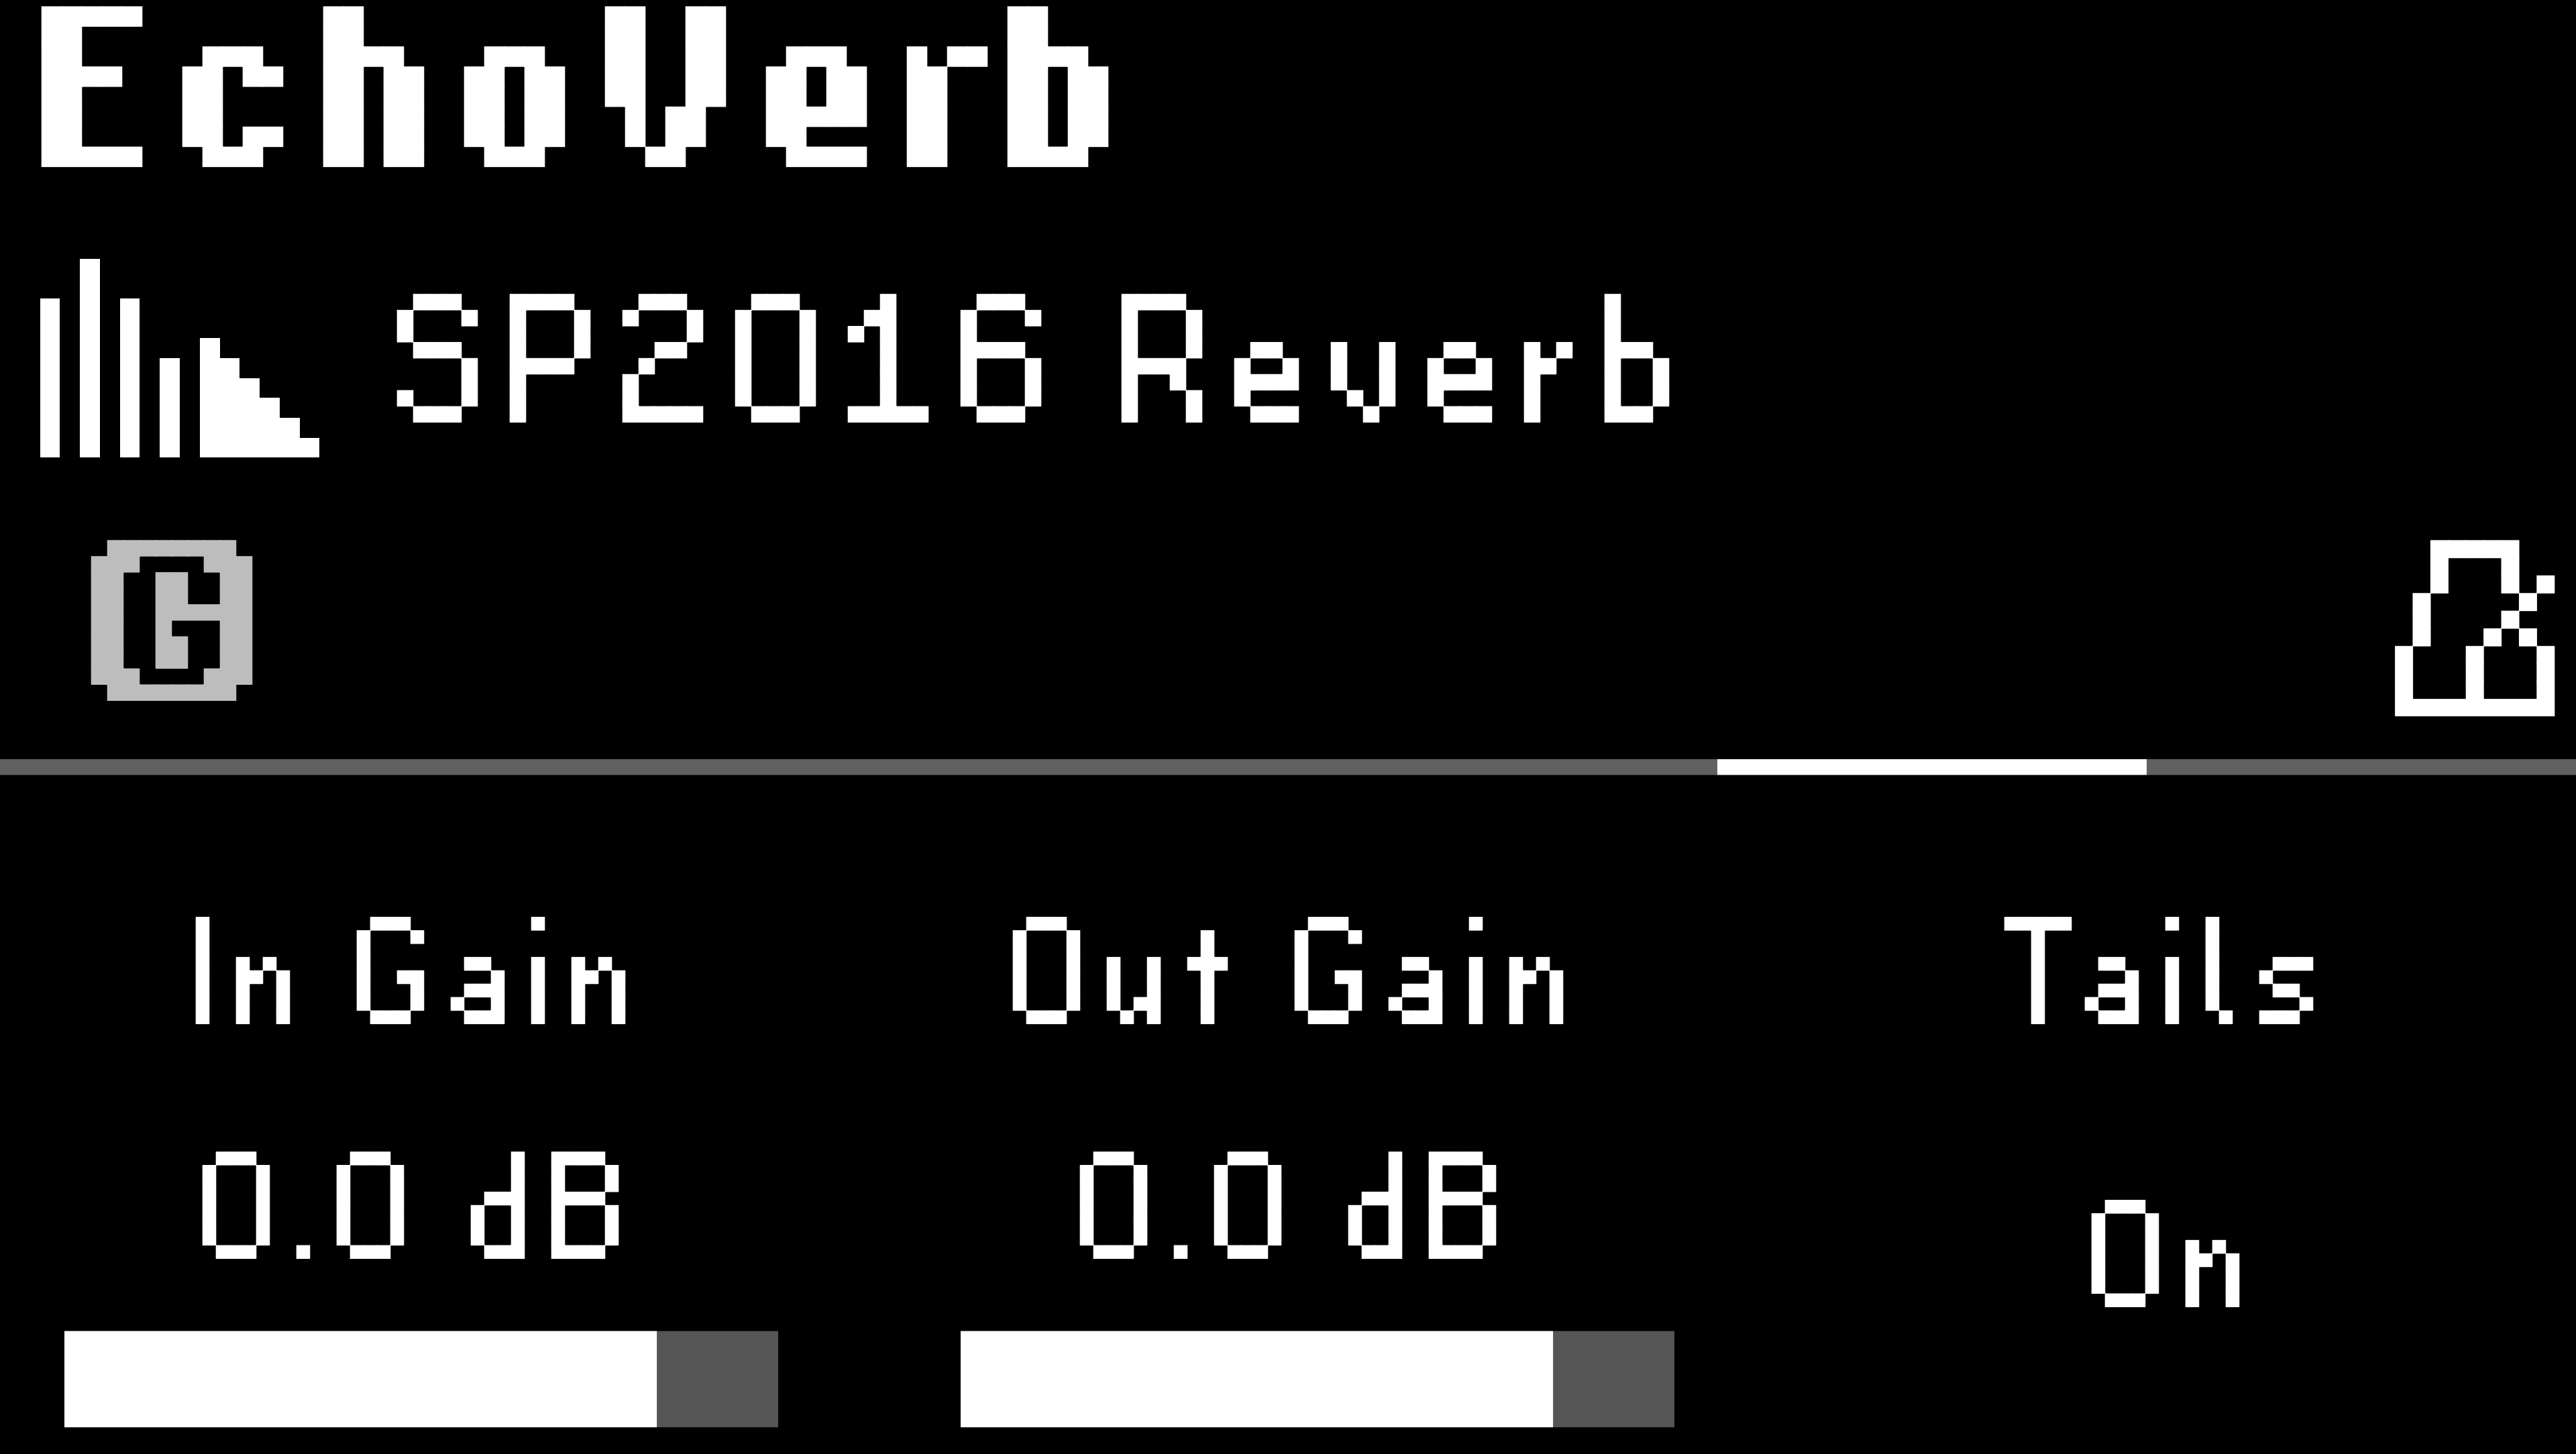
Fig. 6.6 The General parameters are consistent for all Presets.
Press the Parameters Button to toggle between Algorithm and General parameters.
Turn the Big Knob to scroll through all the pages of parameters.
Adjust the parameters by turning the Quick Knobs.
6.2.1. Routing
The H9 contains three Global Routing Modes: Normal, Pre/Post, and Wet/Dry.
Select the Global Routing Mode in the Global System Settings.
Press the Parameters Button to toggle between Algorithm and General parameters. The routing parameter can be found in the General parameters.
The routing parameter will display different options depending on which Global Routing Mode is selected. See below:
Normal - A mono or stereo input is sent to the H9’s effects processor and out of the mono or stereo outputs, depending on the physical connections. Normal is the H9’s default routing mode.
The routing parameter will display “Normal” in greyed out text with no other routing options.
Pre/Post - Allows you to change where the H9 sits in your signal path on a Preset by Preset basis.
Pre: Input 1 will be routed through the effects processor to Output 1, while Input 2 is passed through unchanged to Output 2.
Post: Input 2 will be routed through the effects processor to Output 2, while Input 1 is passed through unchanged to Output 1.
Wet/Dry - Allows you to split the output signal into two mono paths; a Dry, unprocessed path, and a Wet, processed path.
Normal: A mono or stereo input is sent to the H9’s effects processor and out of the mono or stereo outputs, depending on the physical connections (this is the same behavior as Normal mode).
Wet 1/Dry 2: The wet signal from the effects processor is routed to Output 1, the dry signal is routed to Output 2. Stereo inputs are summed.
Wet 2/Dry 1: The wet signal from the effects processor is routed to Output 2, the dry signal is routed to Output 1. Stereo inputs are summed.
Tip
Checkout the Quickstart Guide for help with Pre/Post and Wet/Dry configurations.
6.2.2. Mapping
The H9 offers a wide variety of parameter mapping options for internal and external controllers. All of the custom parameter mappings will be configured in Parameters Edit Mode.
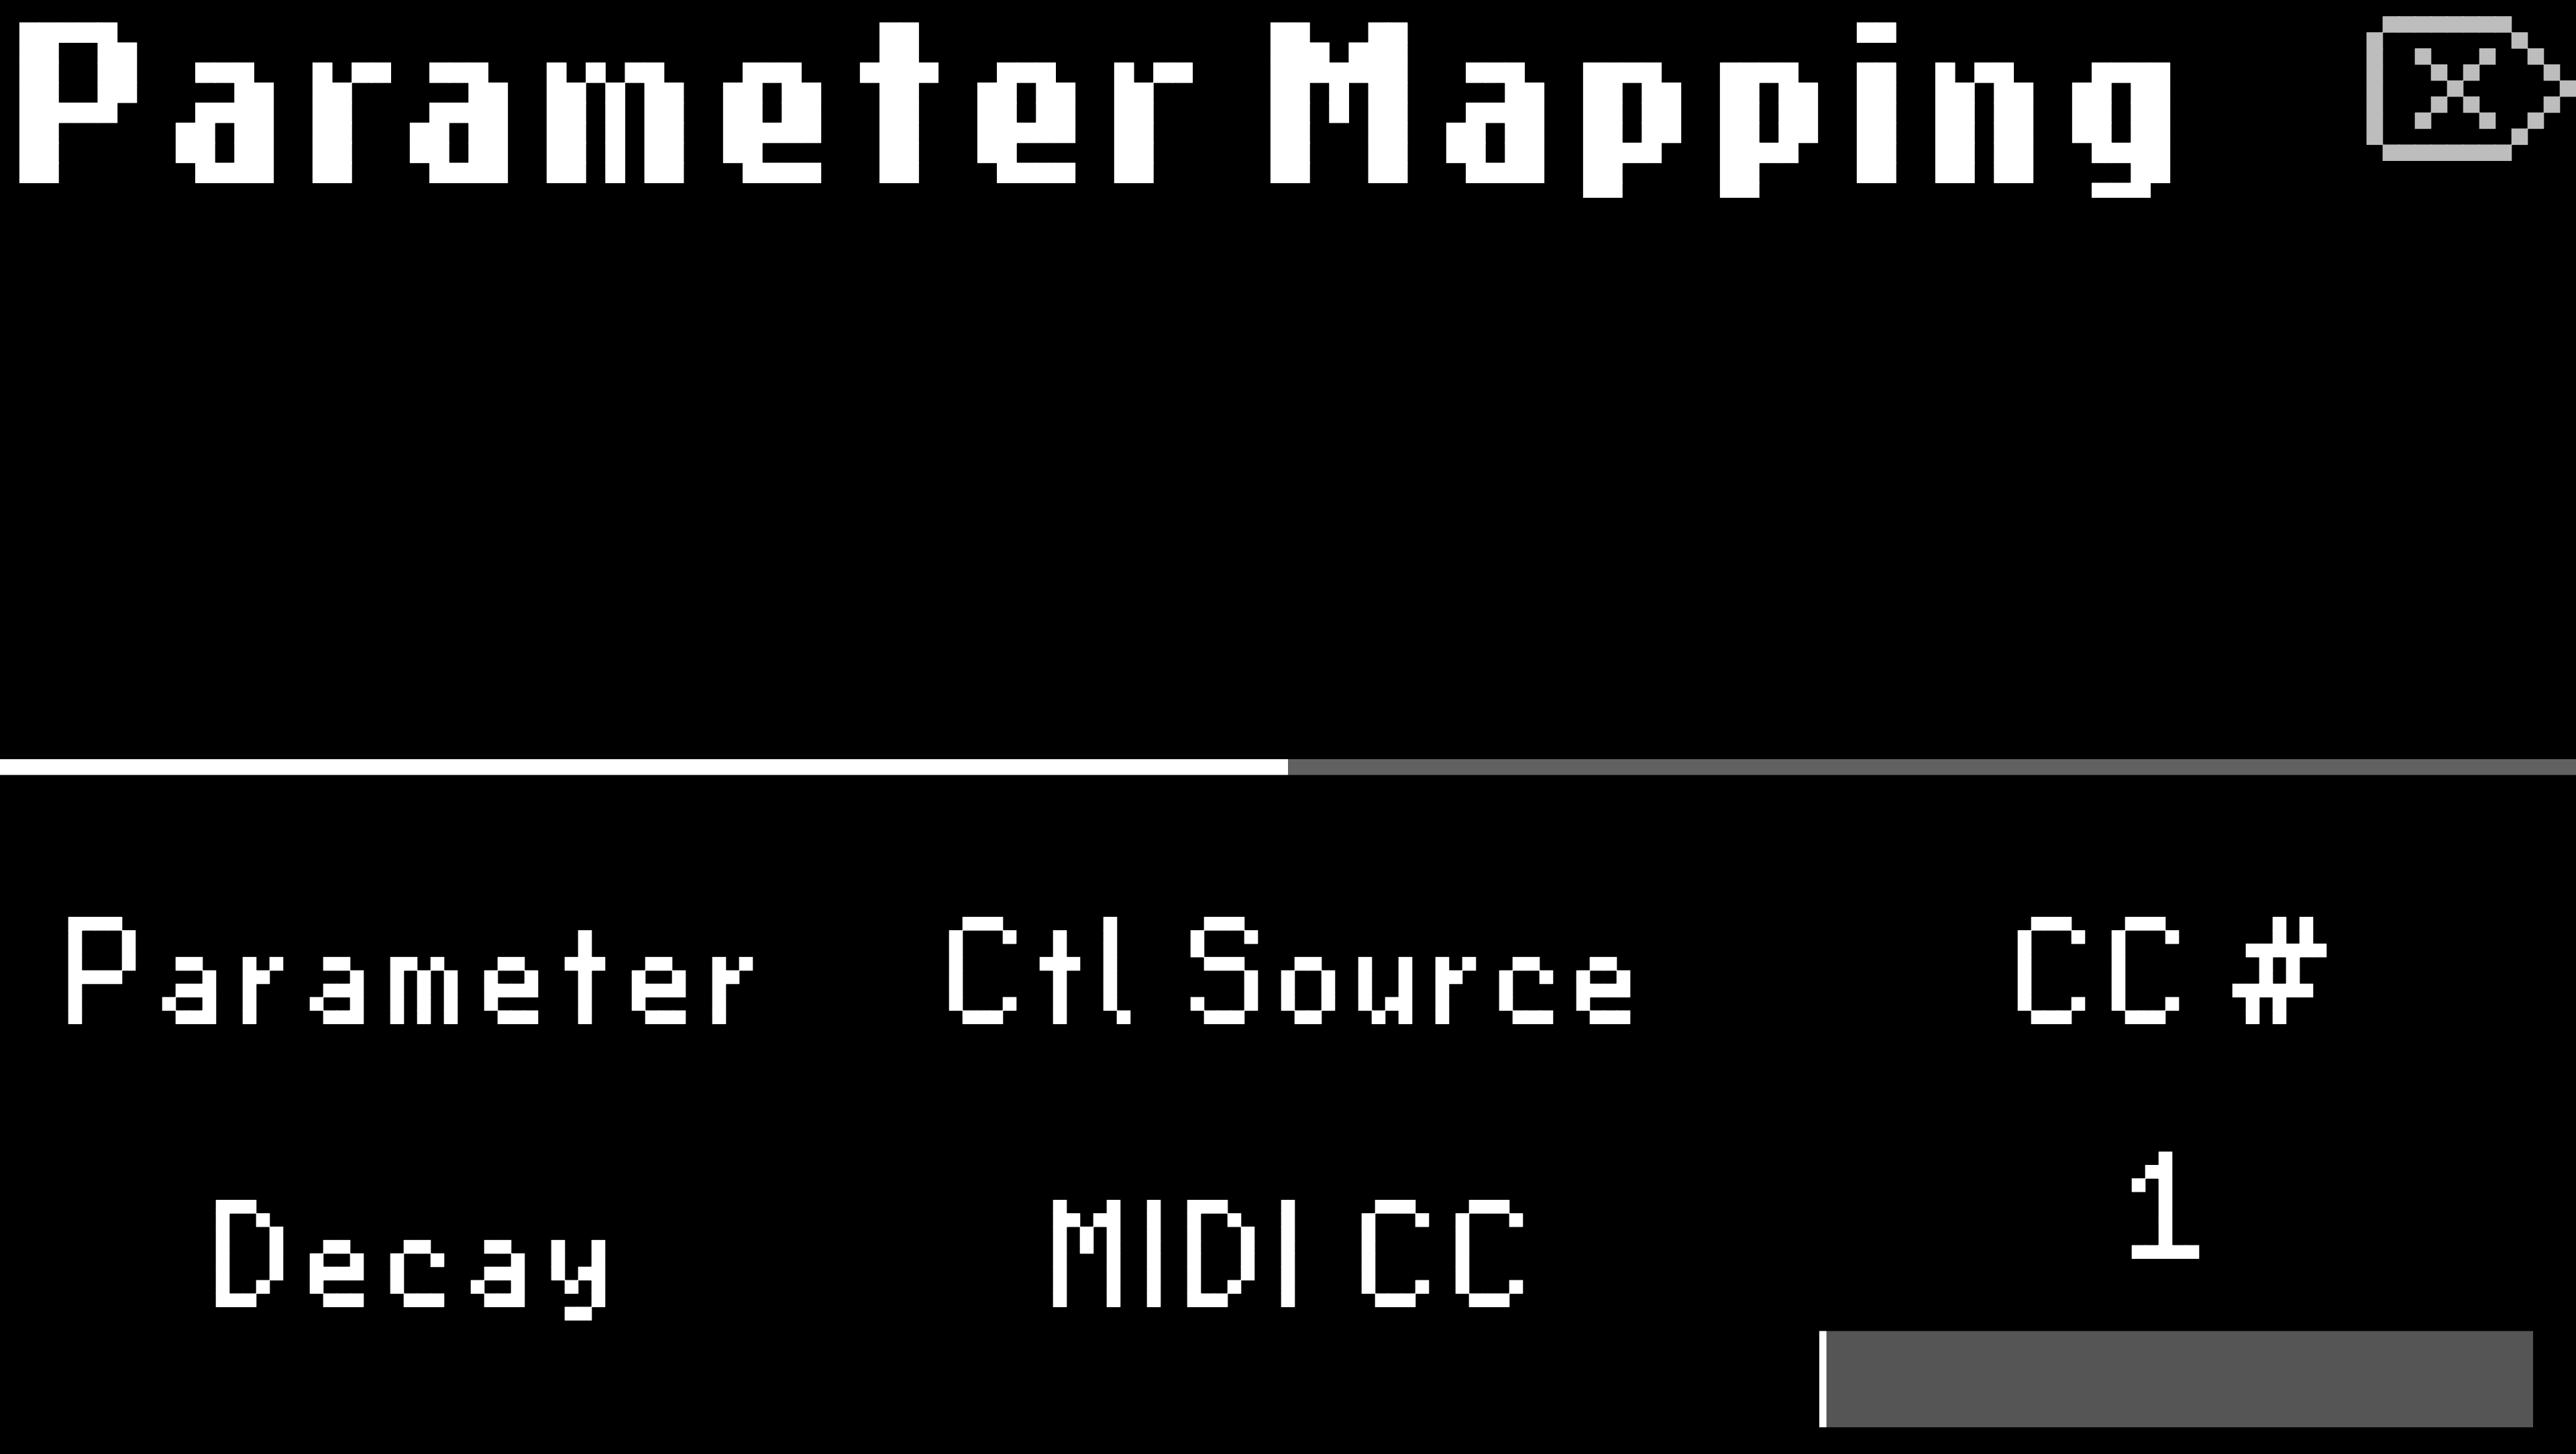
Fig. 6.7 Decay is mapped to MIDI CC 1.
To map a parameter:
Press and hold the Quick Knob that controls the parameter you wish to map.
Turn Quick Knob 2 to select a control source (HotKnob, Expression Pedal, MIDI CC, or Aux Switch).
Turn Quick Knob 3 to select a MIDI CC number or Aux Switch assignment, if applicable.
Turn the Big Knob to view the Control Range menu. Turn Quick Knobs 1 and 2 to set the Start/End or Minimum/Maximum values of the controller.
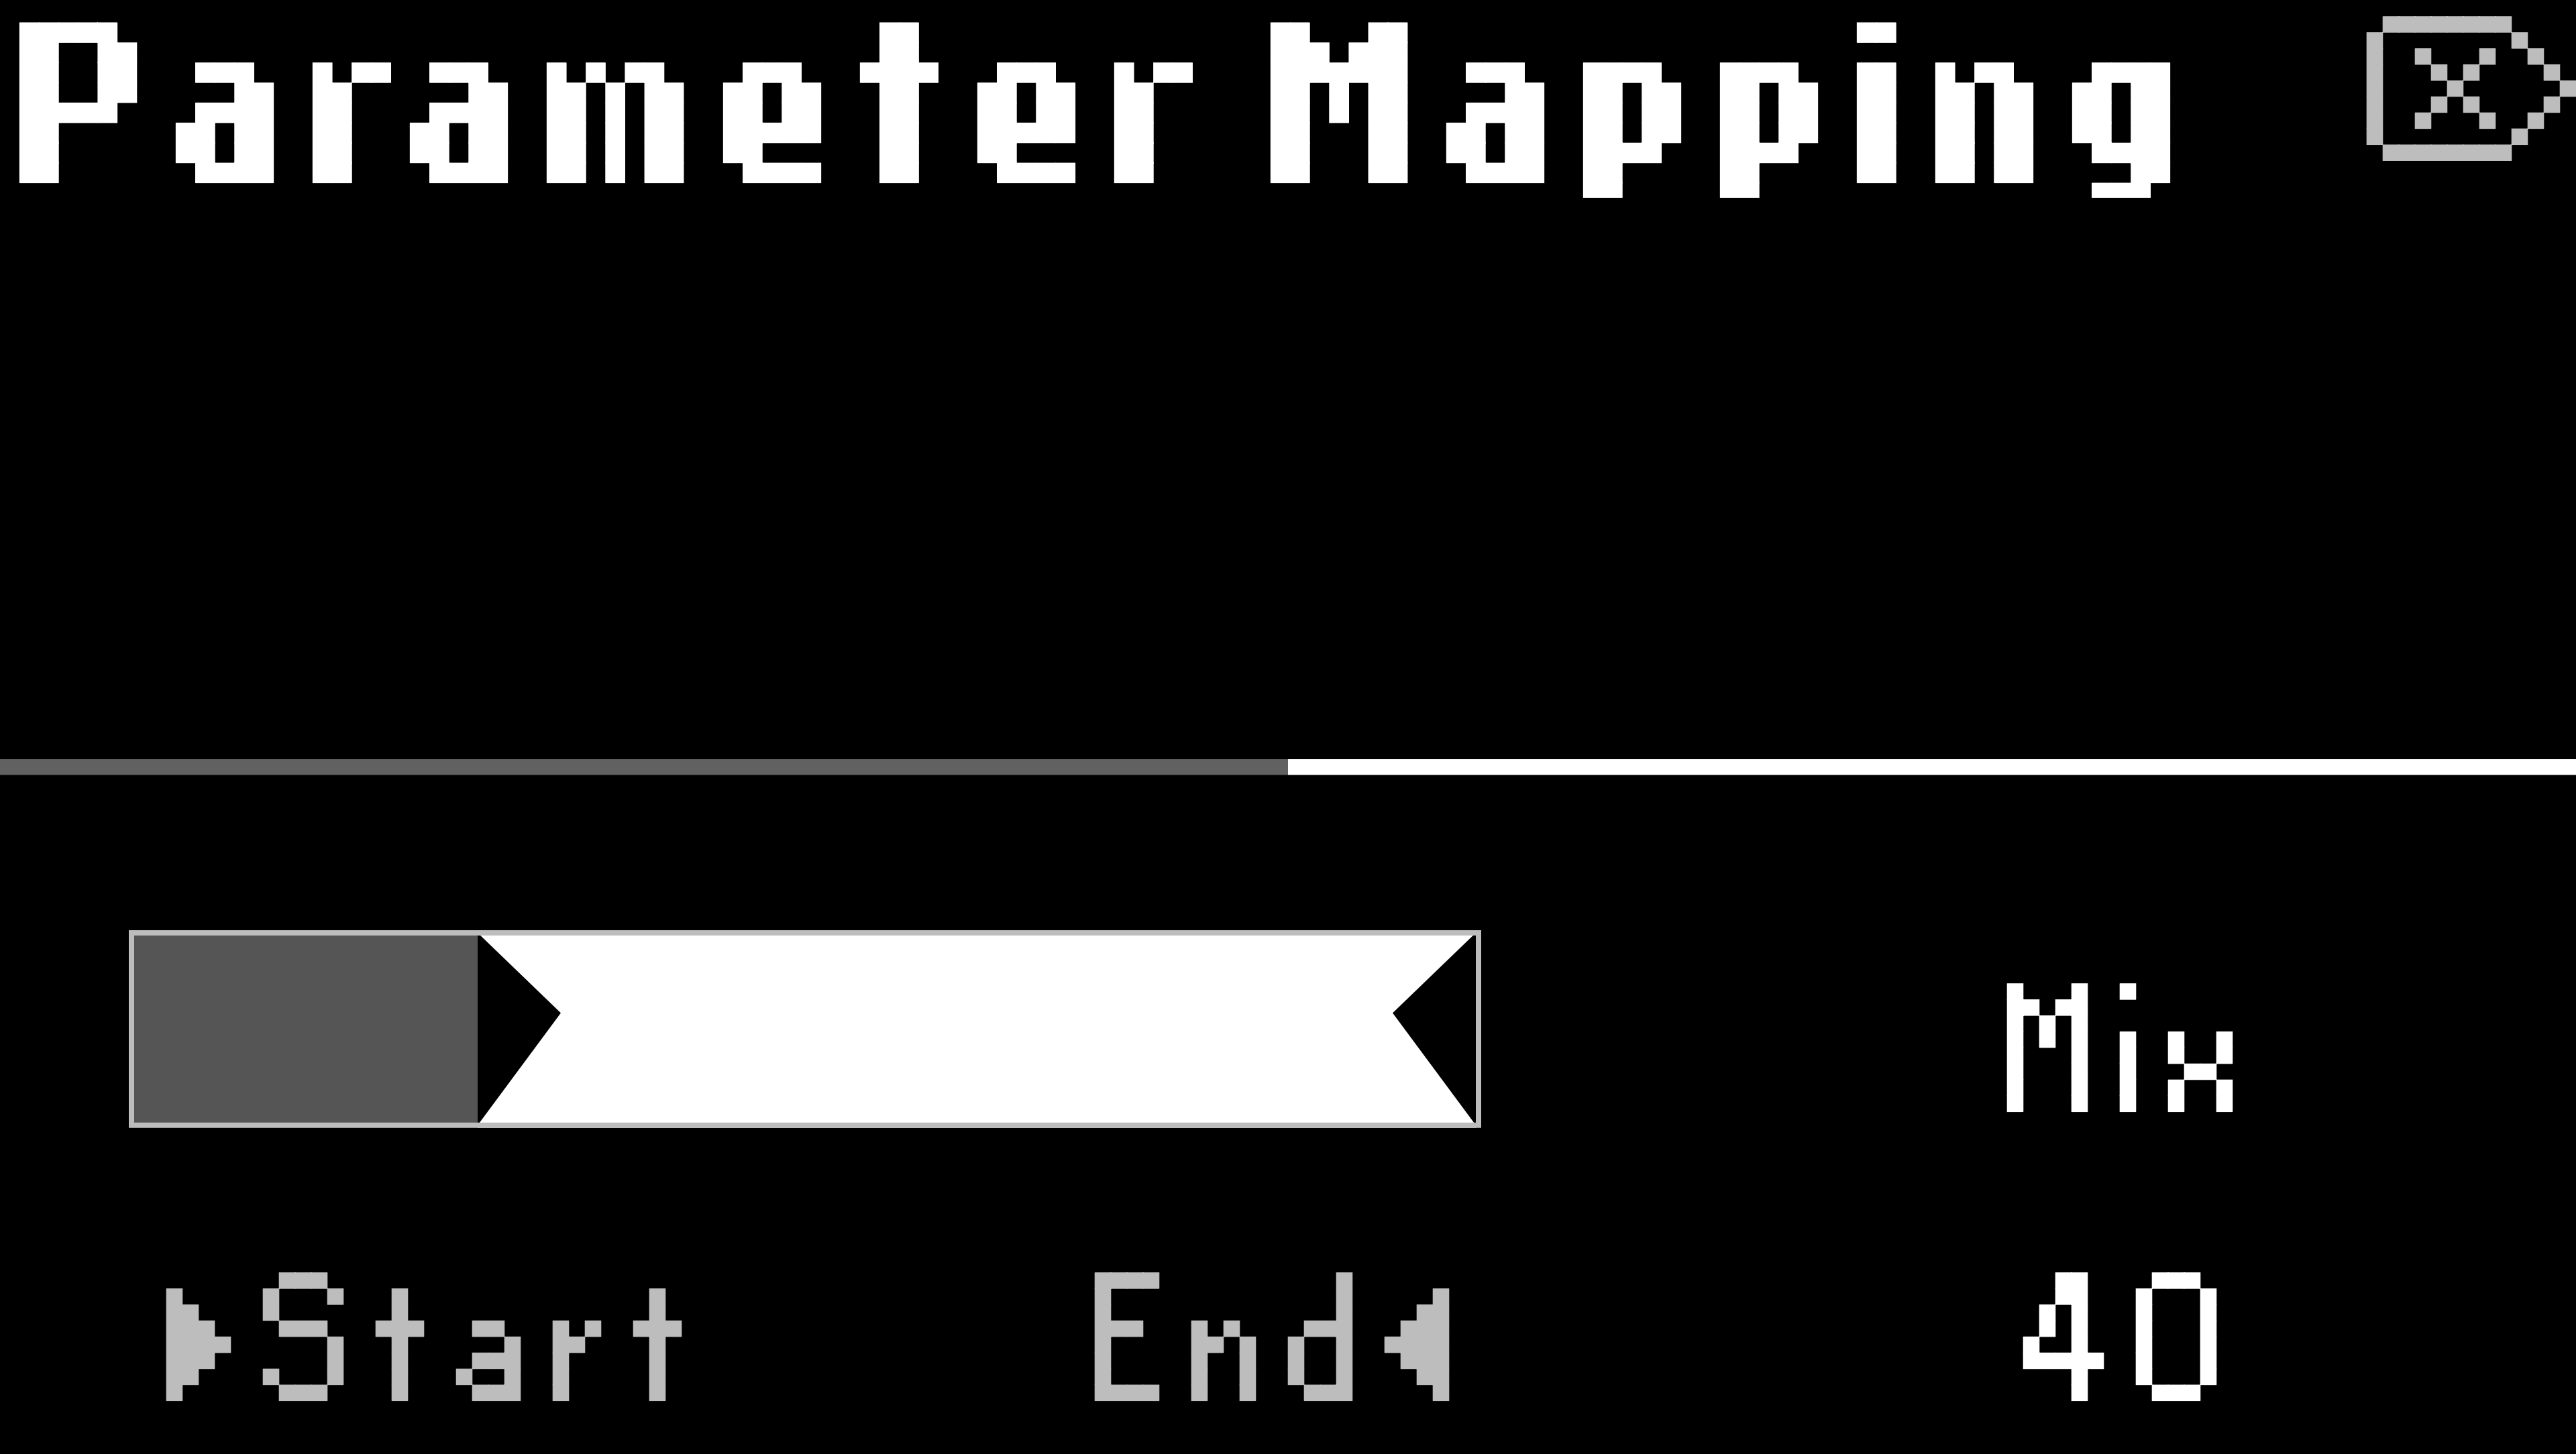
Fig. 6.8 Control Range menu.
Tip
Adjust the End point to be before the Start point to reverse the direction of your controller.
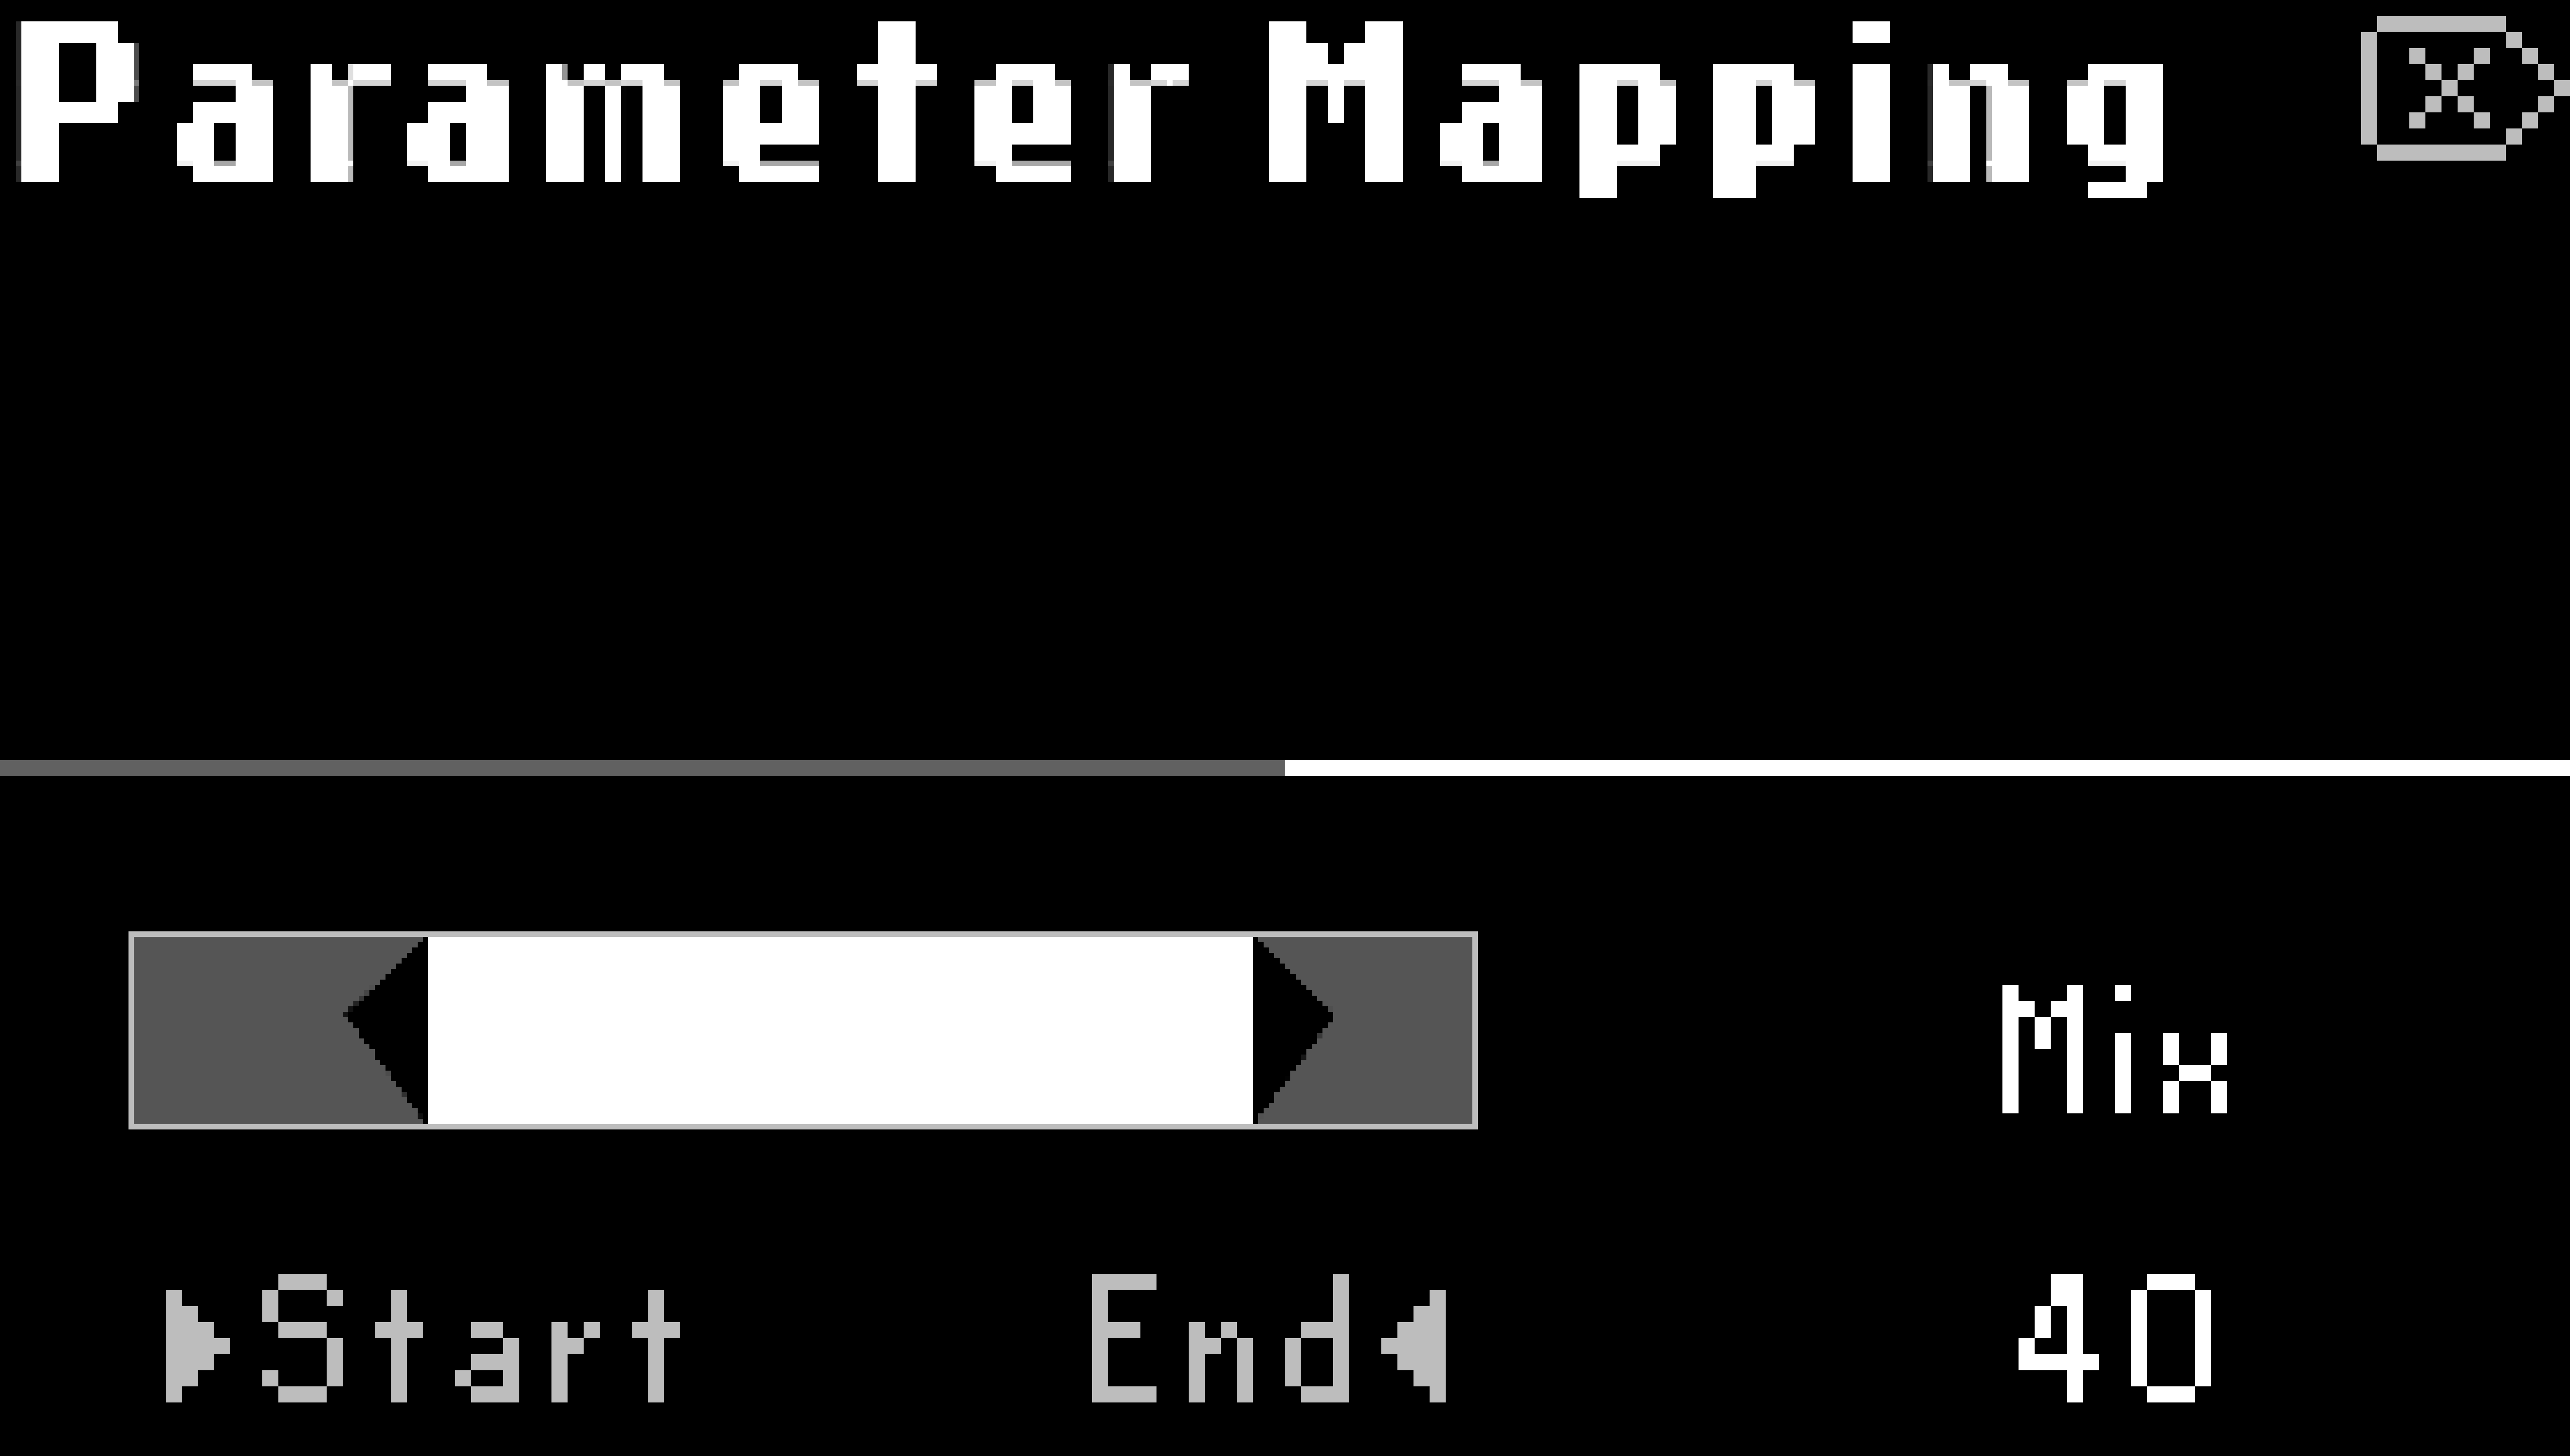
Fig. 6.9 The controller direction is reversed.
Turn Quick Knob 1 to choose another parameter to map.
Set the Control Source to “Off” to un-map a parameter.
Press the Big Knob or any Edit Menu button to exit the mapping menu.
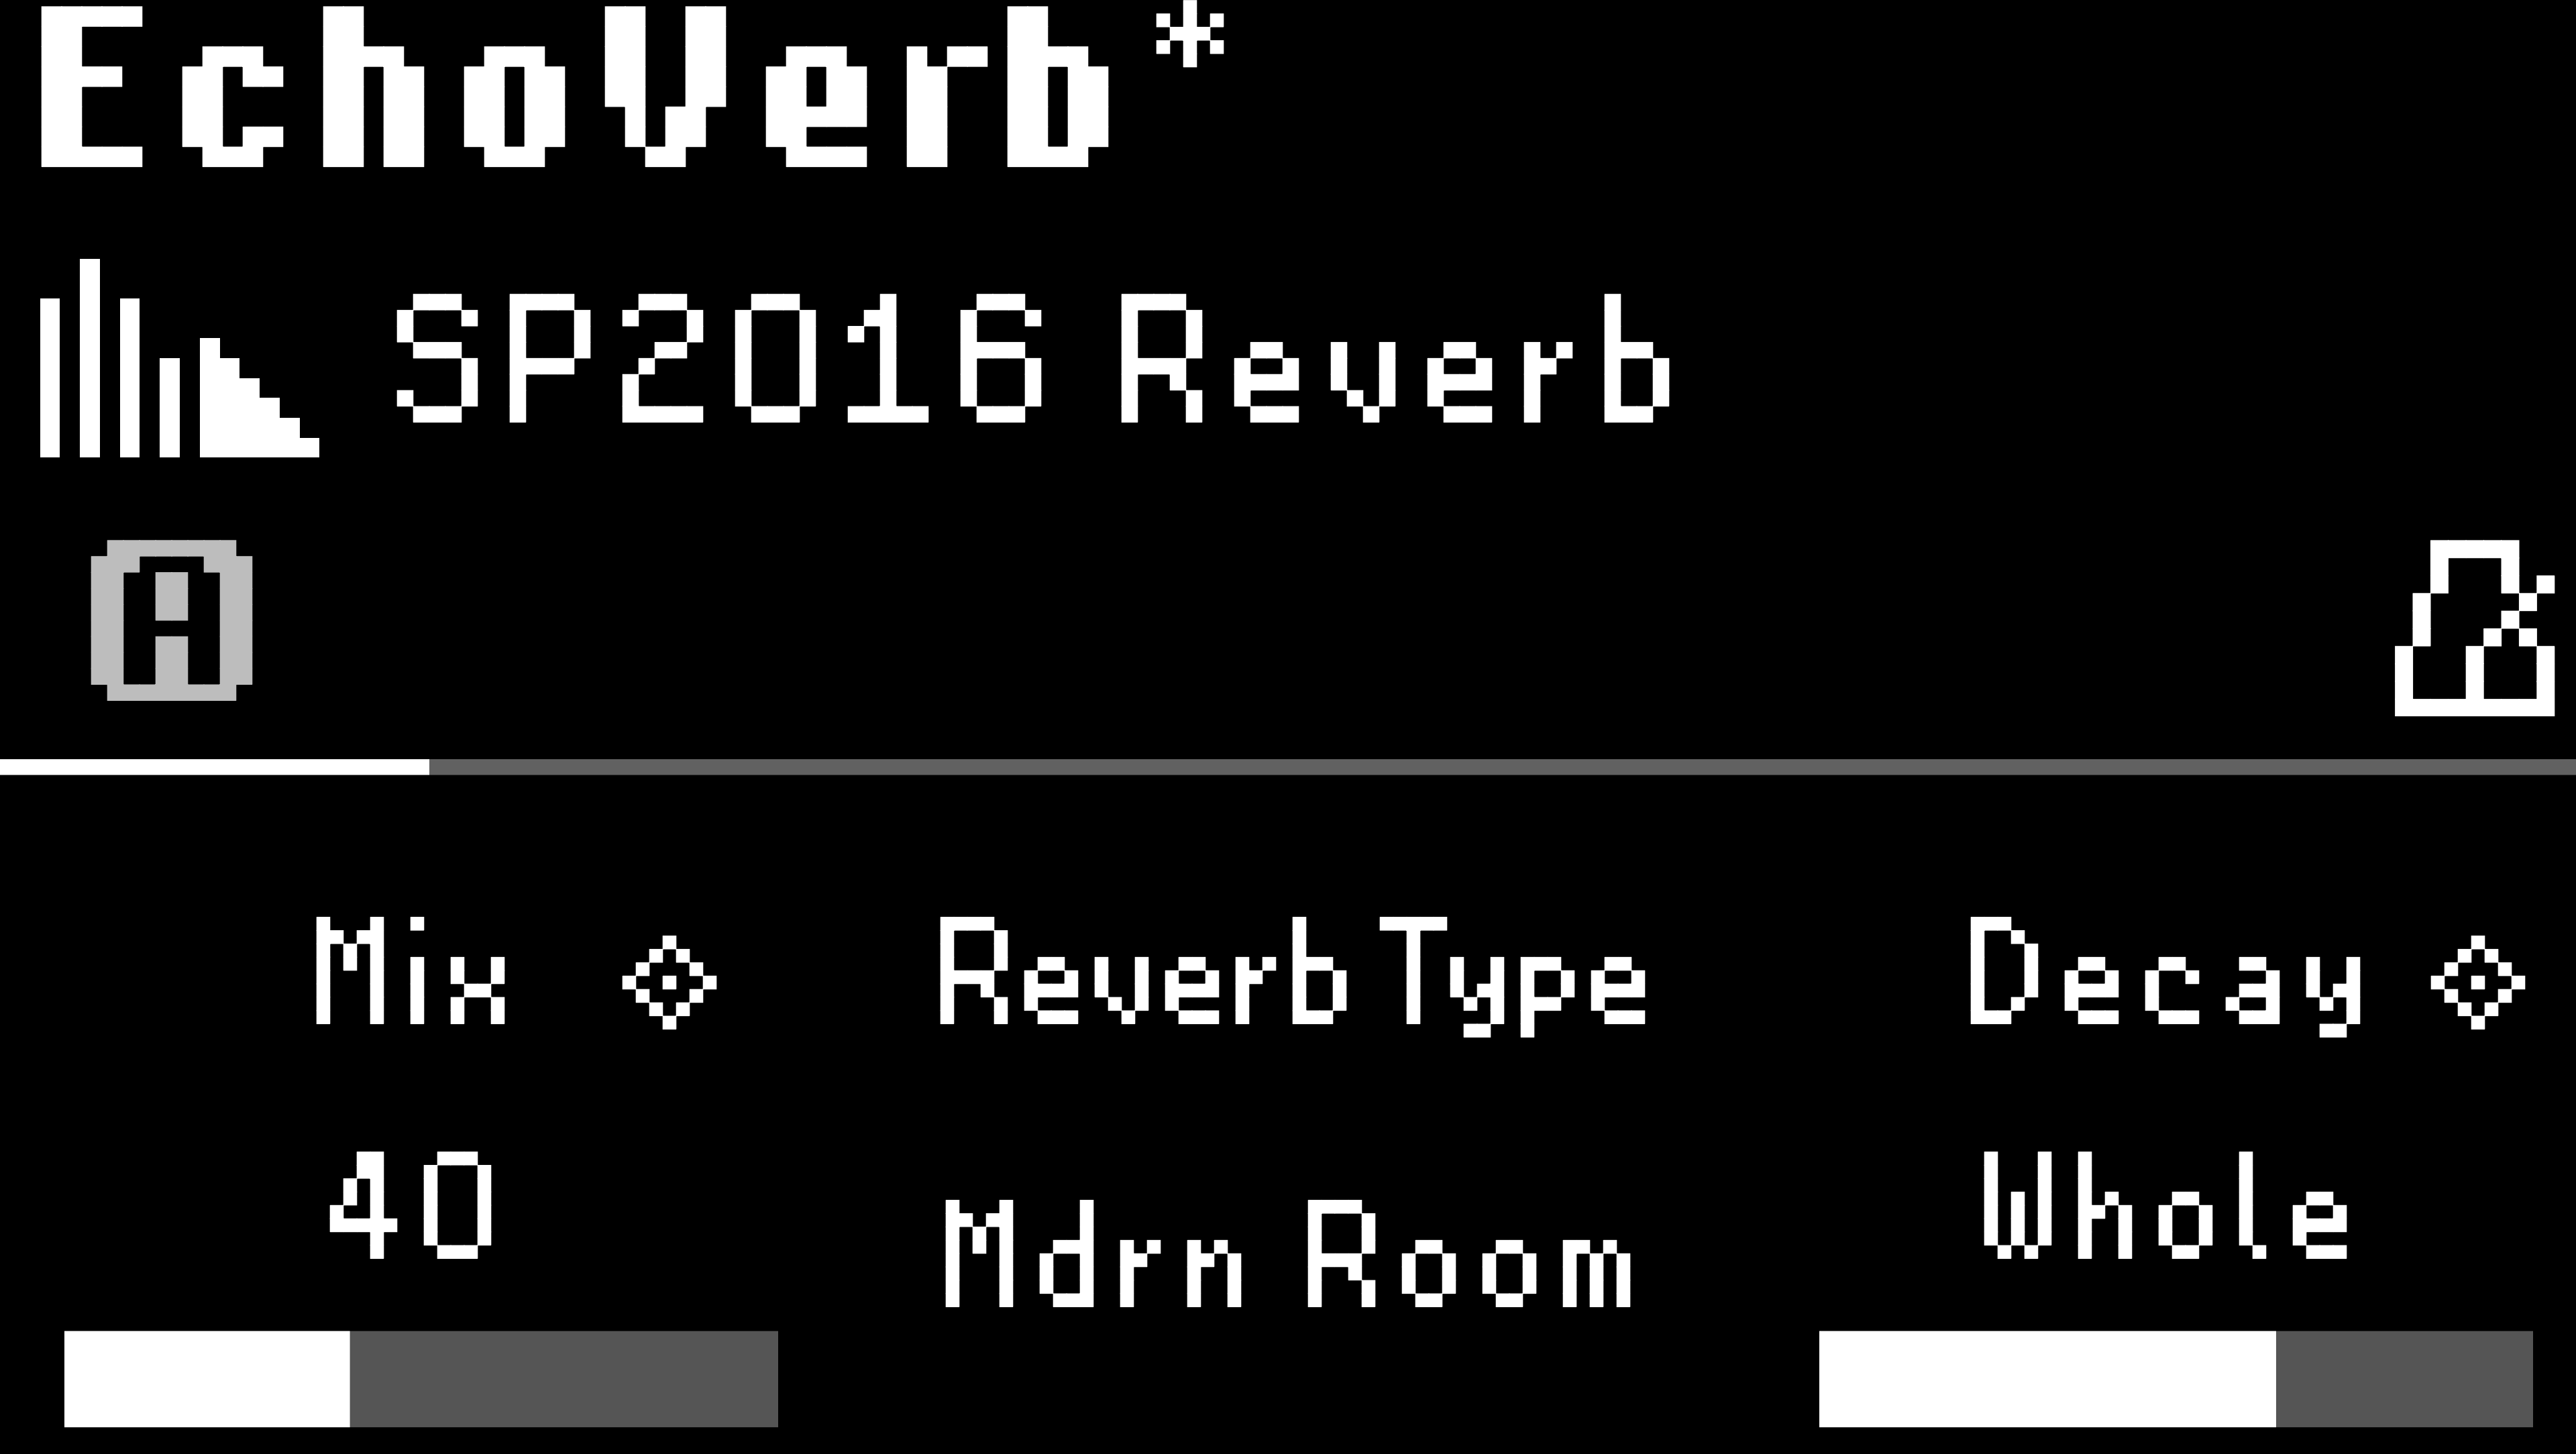
Fig. 6.10 A diamond will be displayed next to the parameter name when it is mapped to an external controller or HotKnob.
6.2.3. HotKnob Mapping
Follow the above instructions to map a parameter and select a HotKnob as the control source.
Go to Perform Mode and turn the Big Knob to adjust the HotKnob.
Fig. 6.11 The Mix parameter is mapped to the HotKnob.
Tip
The HotKnob control is available in the General Parameters and can be assigned to any of the 6 Quick Knobs.
6.2.4. HotSwitch
A HotSwitch can be thought of as a snapshot of a group of parameters. If the chorus of your song needs higher gain and more delay, map those parameters to a HotSwitch and engage it for the chorus. Then, disengage to go back to the previous parameters, or activate another HotSwitch with different parameters for the second verse.
There are two HotSwitches, one for each Footswitch. Mapping parameter values to a HotSwitch allows you to use a Footswitch in Perform Mode to toggle those mapped values. Note that only one HotSwitch can be active at a time.
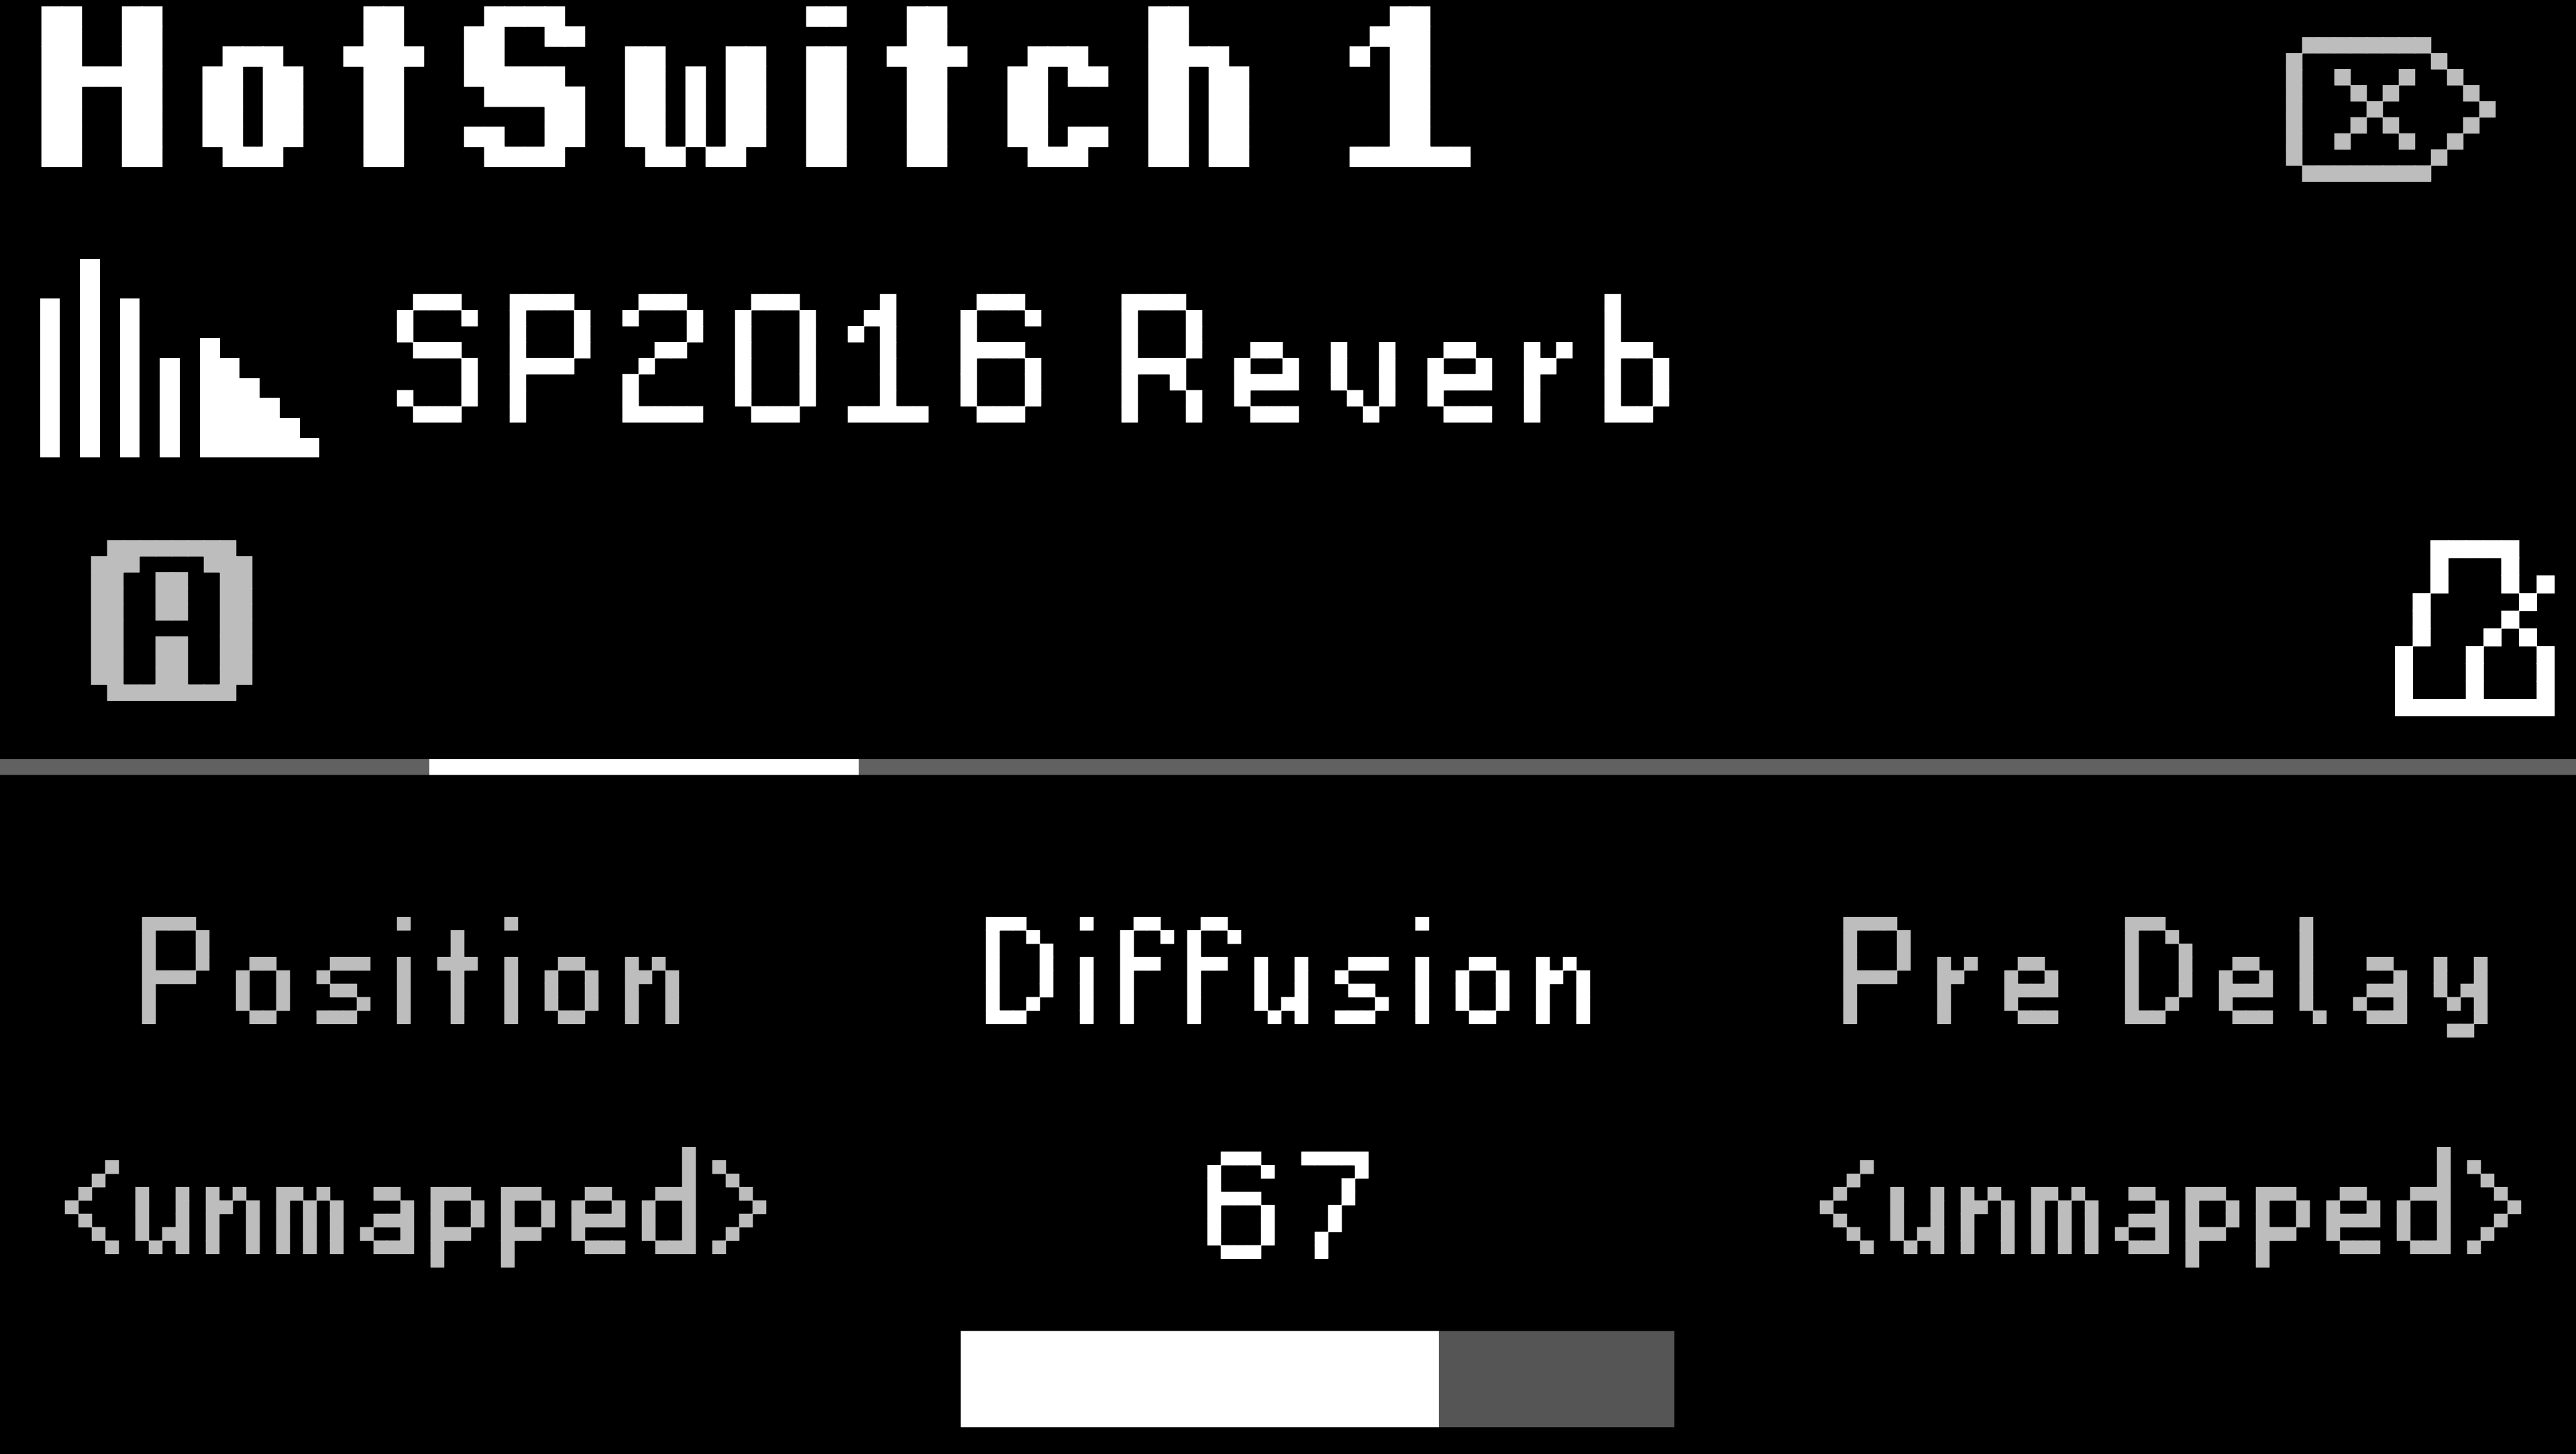
Fig. 6.12 HotSwitch mapping menu displaying the parameters for HotSwitch 1. The Diffusion parameter is mapped to HotSwitch 1.
To map a HotSwitch:
Press the Parameters Button to enter Parameters Edit Mode.
Press and hold the Left or Right LED Button to map its respective HotSwitch.
Press a Quick Knob to assign the parameter to the HotSwitch. Turn the Quick Knob to change the value of that parameter.
Turn the Big Knob to view other parameters to be mapped.
Press the Quick Knob of a mapped parameter to un-map it.
Press and hold the other LED Button to map a different HotSwitch without exiting the mapping menu.
Press the Big Knob or any Edit Menu button to exit the mapping menu.
6.2.5. Tempo Sync
Press the Presets and Parameters Buttons together to toggle Tempo Sync on/off.
Fig. 6.13 A metronome icon will indicate that Tempo Sync has been enabled and time-based parameters will be displayed as note subdivisions.
Tempo Sync determines whether certain parameters will display tempo-synced subdivisions, or a continuous range of rates. For example, UltraTap’s Length parameter can display milliseconds or subdivisions, while Undulator’s Speed parameter can display Hertz (cycles per second) or subdivisions.
Tip
Tap tempo can be used to adjust time-based parameter values with Tempo Sync off. See Tap Tempo for more information.